
Radar Detectors Buying Guide for Vehicle Compatibility Checks
Two vehicles with the same badge can require different detector installations because windshield coatings, mirror housings, USB behavior, and camera packages vary by trim or model year. That turns compatibility into more than finding room for a suction cup.
Before comparing sensitivity or arrows, prove that the intended receiver can see through the glass, sit level without obstructing vision or safety hardware, receive suitable power, and remain reachable. If any link fails, an alternate clear zone, a different portable form, or a professionally installed remote system may be the sensible path.
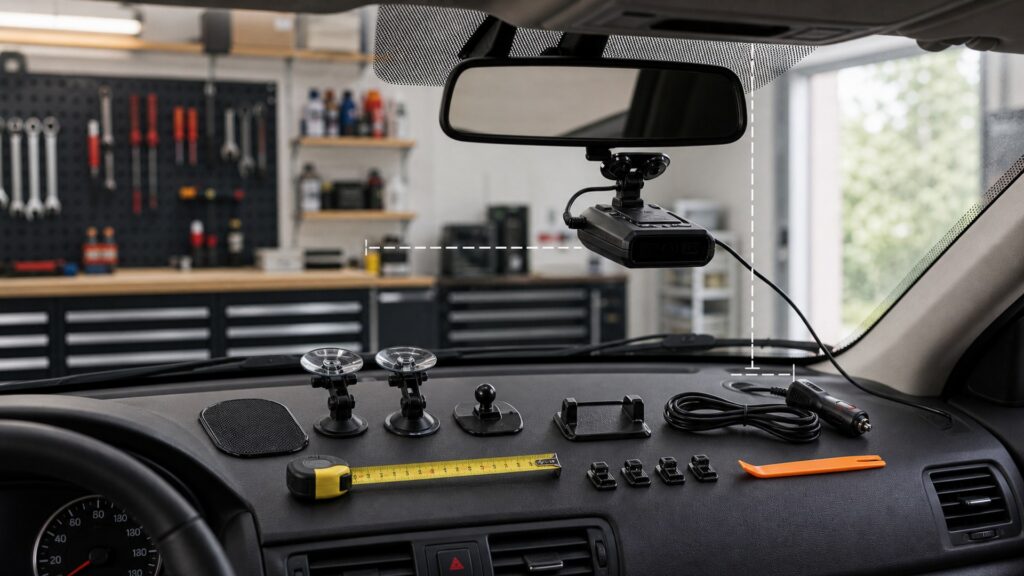
Buying framework
Draw the installation map before selecting hardware
Inspect the actual car in daylight with its owner information available. Record acceptable positions and power routes instead of assuming a catalog compatibility label covers the cabin.
Identify the glass: Find the windshield construction, tint boundaries, embedded elements, and any communication window. Treat athermic or metallic glazing as a reception question requiring model-specific guidance.
Mark usable positions: Check level forward alignment, driver view, wiper coverage, mirror movement, visor travel, GPS sky exposure, and space around factory camera or rain-sensor housings.
Trace power safely: Locate sockets and suitable circuits, confirm voltage and shutdown behavior, and plan cable routing that avoids airbags, pedals, steering parts, sharp edges, and removable service panels.
Simulate daily handling: Sit in the normal driving position and reach the mute control, read the display, remove the unit, operate the visor, and consider where the device goes when parked.
Who this is for
Let the cabin determine the installation class
Vehicle construction can make a basic detector easy, awkward, or impossible to use as a windshield portable regardless of receiver price.
Clear-glass conventional cabin: A compact portable usually works when a level legal position has clean forward glass, usable power, control reach, and no conflict with wipers or the mirror.
Heat-reflective windshield owner: Locate and test the factory communication area before buying. A narrow cutout may dictate detector size, GPS behavior, cord direction, and whether the display remains visible.
Crowded mirror and camera zone: Large ADAS housings, rain sensors, head-up-display areas, and visor motion can eliminate popular high mounts. Use only positions allowed by vehicle and detector guidance.
Shared, rental, or security-conscious driver: Favor quick removal, a repeatable bracket position, portable cord storage, and settings that survive power loss. Permanent trim routing may be inappropriate for the ownership pattern.
Remote-install candidate: Consider separated antennas when glazing or sightline constraints defeat portable reception. Verify external locations, controller access, labor, serviceability, weather exposure, and the laws governing the intended system.
What to pay attention to
Compatibility details hidden outside the detector spec sheet
The receiver, vehicle, power source, and cabin electronics form one system. Validate each interface on the exact model year and equipment package.
Reception & Placement
Confirm RF transmission, straight alignment, optical view, satellite reception, mount stability, and clearance from factory equipment.
Power & Cabin Integration
Match the electrical supply, safe cable route, controls, nearby electronics, app host, removal routine, and future service.
Windshield construction: Search the owner manual and glass markings for solar, infrared, acoustic, or metallic layers, then find any designated toll-tag zone. Similar-looking replacement glass may behave differently.
Bracket geometry: Measure detector body depth, cup or adhesive footprint, articulation range, windshield slope, and cable exit. The antenna must remain level rather than merely appearing tidy from the seat.
Factory sensor clearance: Keep the mount and wire outside camera fields, rain/light sensors, defrost traces, mirror travel, and manufacturer keep-out areas. Never attach hardware to a camera cover or sensor module.
Power-source behavior: Confirm required voltage, current, connector, startup tolerance, and whether each socket or USB port shuts down. Constant power can drain a battery unless the device or kit manages sleep correctly.
Hardwire architecture: Use the specified kit and a suitable protected circuit with a sound ground. Route behind trim only after locating curtain and knee airbags, clips, service access, and wire movement.
Cabin interference: Test beside dash cameras, chargers, infotainment screens, wireless accessories, and heated glass. Separate noisy equipment or power supplies before blaming detector sensitivity or GPS.
App and phone fit: Check Bluetooth or Wi-Fi pairing, supported operating systems, simultaneous connections, background permissions, data needs, and whether mounting the phone creates another sightline or distraction problem.
Avoid these traps
Fit assumptions that can defeat reception or safety
Most compatibility errors are visible before purchase if the actual glass, bracket, circuit, and trim are inspected rather than inferred.
Treating trim levels as identical: Heated glass, head-up displays, camera packages, and mirror hardware can change within one model line. Verify the exact vehicle identification and installed options.
Choosing position by cable neatness: The shortest route may put the receiver behind coated glass, off axis, under a tint strip, or beside interference. Establish reception and alignment before concealing the wire.
Assuming all USB ports are power equivalents: Outputs differ in voltage negotiation, current, sleep behavior, and data function. Use only a detector-approved supply and confirm reliable startup after repeated ignition cycles.
Pushing wire behind unknown trim: A hidden cable can cross an airbag deployment path or damage clips. Consult vehicle information and use qualified installation rather than probing blindly around pillars and dash panels.
Ignoring future glass service: A windshield replacement can remove a marked location, change coating behavior, or damage an attached cable. Preserve installation notes and retest reception with the replacement glass.
Decision guidance
Choose only after the vehicle passes the fit audit
A less elaborate receiver in a verified position is a better purchase than premium electronics installed behind blocking glass or unsafe trim.
If one clear legal position works: Select a portable whose bracket, body, controls, and cable all fit that zone. Confirm display legibility and removal without shifting the mount angle.
If the clear zone is small or awkward: Prioritize compact dimensions, flexible bracket adjustment, remote mute access, voice alerts, and solid GPS reception. Trial the physical template before finalizing the model.
If power is the only conflict: Compare an approved socket lead, appropriate USB supply, or professional hardwire kit. Verify shutdown and low-voltage behavior rather than altering circuits casually.
If glass or sightline blocks every portable: Price a lawful remote receiver with documented antenna locations and an accessible controller. Include professional labor, disassembly, warranty implications, and future bumper or windshield service.
Ownership & compatibility
Preserve a known-good installation through vehicle changes
A compatible setup can drift as mounts loosen, phones update, glass is replaced, or electrical work changes power behavior.
Record the baseline: Photograph bracket angle, glass zone, cable path, fuse and ground locations, device settings, and firmware. Keep installer documentation with vehicle records.
Inspect seasonal movement: Heat and cold weaken suction cups and adhesives, while vibration shifts joints. Re-level the receiver and replace worn mounting parts before they release unexpectedly.
Retest after service: Windshield, mirror, camera-calibration, battery, trim, or electrical work can affect reception and power. Repeat startup, GPS, alignment, shutdown, and interference checks afterward.
Plan removal: Take down visible equipment when theft or parking conditions warrant, protect the connector, and avoid leaving loose hardware where it can become a projectile.
FAQ
Vehicle fit questions to answer before checkout
Use the exact model year, trim, windshield, and power equipment when applying these answers.
How can I tell whether my windshield blocks radar?
Where should a portable detector be mounted?
Can a high mount hurt GPS reception?
Will a detector interfere with my vehicle's ADAS cameras?
Can I power a detector from any USB socket?
Will hardwiring drain the vehicle battery?
Why does the detector alert near my dash camera?
What phone checks matter for app-connected detectors?
When is a remote radar detector the better fit?
Bottom line
Prove compatibility on the actual vehicle
The purchase is viable only when the receiver can see, sit, power up, communicate, and come apart safely in the exact cabin.
Verify reception: Identify glass construction, clear zones, antenna angle, GPS view, and nearby interference.
Verify integration: Protect sightlines, cameras, airbags, controls, circuits, trim, and phone behavior.
Verify ownership: Document removal, service, seasonal inspection, updates, and remote-install access.
Reading Shortcuts
Audit the exact cabin before comparing features.
Decision Reminders
Compatibility is physical and electrical.
- Glass: Identify coatings and clear zones.
- Angle: Keep the antenna level and forward.
- Cameras: Honor every factory keep-out area.
- Power: Verify supply and shutdown.
- Trim: Keep wiring away from airbags.
- Service: Document removal and reinstallation.
Glossary Snippets
Terms used in a vehicle fit audit.
When to Use a Top 10 Review
Rank products only after usable positions are known.
- Measure: Body, bracket, zone, and cable.
- Filter: By power and app compatibility.
- Check: Remote accessories if glass blocks RF.
- Exclude: Unsafe or unreachable installations.
Already down to 2–3 options? A Comparison is usually the faster next step.
When to Use a Comparison
Fit finalists in the same approved location.
- Place: Check alignment and clearances.
- Power: Repeat startup and shutdown.
- Operate: Reach mute and read alerts.
- Remove: Test parking and service routines.
Still exploring? Start with a Top 10 to build a shortlist first.