
Rowing Machines Buying Guide for Home Workouts
A rowing machine that seems suitable for two showroom minutes can become awkward at home. The rail may block a walkway, the handle can reach beyond the measured cabinet, fan or tank sound can travel, and a folding claim may still require two hands and open floor space. Start with one repeatable home session and its complete setup-to-storage route.
Calculate the complete home setup. Concept2 currently lists its standard-leg RowErg at $990 before delivery, while connected magnetic machines can add screens, power, Wi-Fi, and recurring training fees. The useful comparison is not cheapest versus fanciest; it is controlled stroke fit, understandable feedback, acceptable sound, approved storage, and service that remain workable in the actual room.
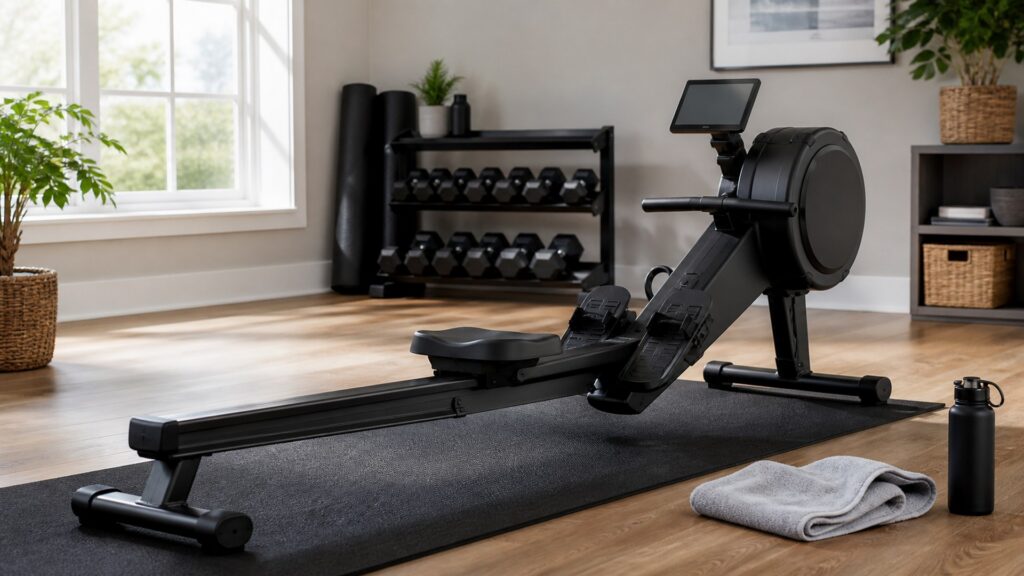
Buying framework
Build the home routine around the full stroke
space readiness, fast start-up, noise tolerance, and cleanup determine if a home rowing machine remains obtainable.
1. Describe the routine you will actually row: Describe when rowing will happen, how long setup may take, who may be sleeping or working, and if the row uses classes, independent intervals, or steady rowing. Account for the shortest session worth starting.
2. Mark the complete operating area: Tape the rower cabinet plus knees, handle or arm movement, positioning travel, mounting, exit, airflow, fan, water bottle, display viewing, and care access. Keep cords outside home paths.
3. Rehearse start-up: From the room's usual state, change training shoes, adjust the seat, start the monitor and resistance system, connect any phone or tablet, place water, and begin timing. Friction measured in minutes often matters more than another workout program.
4. Listen through the house: Warm the drivetrain, row at usual and brisk stroke rate, then have another user listen in the next room and below. Separate fan, belt, stroke, flooring vibration, speakers, and user-generated noise.
5. Reset the space: Stop the flywheel, step-off, clean perspiration, remove personal devices, restore neutral adjustments, manage training shoes and towels, and leave walkways clear. The home should tolerate this full cycle.
Who this is for
Home rowing formats and their room tradeoffs
The same rowing machine may be convenient in a dedicated space and disruptive in a bedroom, office, or shared living area.
Dedicated home gym: Permanent location reduces rolling and setup, allowing a heavier full-length air, magnetic, or water rower. Preserve repair access, flooring protection, airflow, lighting, and space for any off-rower work.
Bedroom or office user: Quiet start-up and a small in-use area matter, but display glow, calls, airflow, and chair movement also compete. Try the rower during the actual work or sleep window.
Class-first home: A large integrated display may simplify guided rows, yet membership, account, speaker, shoe, and update requirements become ownership costs. Verify basic rowing remains possible during an internet or repair interruption.
Independent-training user: A straightforward console or performance monitor may preserve quick starts without entertainment. Verify stroke rate, watts or heart-rate compatibility, phone location, interval controls, and records export needed by the plan.
Multi-purpose space: A compact hydraulic rower or separable long-rail rower consumes less length than many treadmills, but built-in wheels do not make a 100-pound rower effortless. Rehearse the specific move and parked location.
What to pay attention to
Specifications that change a home rowing session
Judge measurements, power, noise, controls, and cleanup as components of one home installation.
in-use area: Catalog dimensions leave out user knees, mounting, positioning, cooling, fan location, phone or tablet access, and maintenance. Mark these zones while doors and usual furniture stay in their day-to-day positions.
flooring contact: A compatible dense mat may preserve surfaces, but soft material may increase rocking. Level each stabilizer, Inspect mat migration once hard rows, and Verify flooring load or finish concerns with the appropriate source.
Power and cable: A self-powered monitor may use batteries or flywheel energy, while a connected display may need a wall outlet. Note outlet circuit, adapter location, standby behavior, power cable length, trip exposure, and if unplugging affects adjustments.
home noise: Magnetic resistance may reduce braking noise, but belt, bearings, foot stretchers, fan, speakers, chassis, and flooring still contribute. Evaluate a warmed rower at matched stroke rate in the planned space.
start-up route: Count positioning actions, sign-in steps, training shoes changes, connection, software updates, and menus prior to the row can begin. A manual quick-start mode protects brief rows when connected services are unavailable.
Cooling and hydration: Indoor rowing creates concentrated heat and perspiration. Place airflow and water where neither requires leaning across moving foot stretchers, and keep towels away from resistance, flywheel, and console openings.
repair route: Leave access to foot stretchers, connectors, positioning posts, drive covers, power inlet, leveling feet, and serial number. Document how the rower exits the space without scraping floors or dismantling doorway trim.
Avoid these traps
Home rower plans that fail once arrival
Home-use problems usually come from location, start-up friction, noise, or cleanup rather than insufficient resistance.
Measuring the chassis only: A rower that fits between furniture may still block knee travel, mounting, seat positioning, fan airflow, or a doorway. Tape the entire in-use and repair area.
Planning to roll it each day: Built-in wheels are easiest to use on smooth, level flooring. carpet, raised thresholds, corners, cords, and rower mass make repeated relocation slower and riskier than a catalog photo suggests.
Hiding all supplies: training shoes, foot straps, towel, water bottle, sensor, remote, and care products add start-up time when stored across the house. Give maker-approved accessories a reachable, ventilated home.
Assuming headphones solve noise: Headphones reduce speaker noise for the user but do not change handle-return or seat-roller knocks, fan noise, chassis movement, or vibration heard in adjoining rooms.
Ignoring cancellation behavior: A connected rower may lose classes, detailed metrics, user profiles, or app integrations after membership cancellation. Verify that the machine still offers useful load control, pace feedback, cadence, and interval timing without the paid platform.
Decision guidance
Perform a three-day home simulation
A taped area and timed process reveal conflicts prior to a heavy rowing machine enters the space.
Mark the rower and user: Tape the assembled measurements and add knee, mounting, positioning, fan, water bottle, and step-off space. Keep the taped outline in place through several days of normal household traffic.
Time two startups: Time both a connected class start and a five-minute manual row. Account for training shoes, water, sign-in, phone or tablet connection, user profile selection, and return to neutral adjustments.
Inspect each listener: Identify sleeping, working, or neighboring listeners and Try comparable mechanical or flooring noise during the planned training session window. Note which source actually causes disturbance.
Walk the arrival route: Measure the package, doors, corners, stairs, elevator, railings, and final installation area. Get written confirmation of stair fees, room delivery, assembly, packaging disposal, and return collection.
Practice the cleanup: Place a towel, water bottle, fan, training shoes, and maker-approved cleaning product in the taped space. Verify each may be used and stored without entering stroke travel or blocking airflow.
Ownership & compatibility
Keep a home rower ready without crowding the space
A home rower stays ready when the rail, seat rollers, foot straps, handle return, floor contact, and monitor receive regular attention.
clean immediately: Clean touch points and perspiration paths once each row using maker-approved products, then let damp towels and training shoes dry away from console electronics, flywheel openings, and home fabrics.
Recheck location: Inspect leveling feet, mat edges, power cable routing, and free space once early sessions or any move. Restore the measured area if the rower migrates toward furniture or a doorway.
Stage essentials: Keep compatible training shoes, water bottle, towel, heart-rate sensor, phone or tablet cable, and cleaning product nearby without placing loose items where foot stretchers, built-in wheels, children, or pets may reach them.
Control accounts: Give each connected-rower user a separate profile, protect sign-in details, and schedule updates deliberately. Delete stored workouts before service or resale, and keep a documented manual-start procedure for internet outages.
Respond to changes: Note new clicks, belt sounds, resistance lag, stroke movement, console faults, heat, or odor. Stop use when the manual directs rather than masking a developing problem.
FAQ
Home rowing machine FAQ
workable answers about location, noise, floors, subscriptions, and day-to-day readiness.
Where should I put a rowing machine at home?
Does a rowing machine need a floor mat?
Are magnetic rowing machines quiet enough for apartments?
may I move a rowing machine once each row?
Do connected rowers work without internet?
How much free space should I leave around a rower?
What home arrival questions should I ask?
How may I preserve a short training session from setup delays?
How often should a home rower be maintained?
Bottom line
Buy for an ordinary day at home
A successful home rowing machine starts quickly, fits the space, respects other occupants, and returns cleanly to a ready state.
space: The full in-use area survives usual home traffic.
process: Both short and full sessions start without avoidable delay.
noise: Actual listeners accept warmed-rower and flooring noise.
Reset: perspiration, accessories, profiles, and adjustments are handled once each row.
Rowing Machine Route
Use these checkpoints prior to comparing home rower products.
Rowing Machine Boundaries
A home rower must coexist with the space prior to its entertainment features matter.
- chassis is not use space: Add user movement.
- Wheels have limits: Rehearse relocation.
- Headphones cannot block structural vibration: Try listeners.
- Apps may change: Preserve manual use.
Rowing Machine Terms
Terms used in this home rower guide.
When a Rowing Machine Ranking Helps
Home-rower rankings help only once the space and process are defined.
- Best suited for: Prefer installed measurements, noise protocol, start-up steps, offline behavior, fit testing, arrival scope, and local repair evidence.
- Known drawback: Lists may overvalue screens while ignoring flooring transmission, accessory clutter, membership dependence, and the effort required to move a heavy rower.
Evidence note: room planning, stroke fit, maintenance, and delivered cost use current Concept2 RowErg specifications as one transparent reference point. No Review Streets hands-on test is claimed. Checked September 21, 2026.
Compare Rowing Machine Finalists
Evaluate rowing machines in the home sequence from start-up through cleanup.
- Evidence check: Measure the home stroke envelope, row the machine warm, listen from nearby rooms, rehearse approved storage, and verify the exact residential manual and warranty.
- Ownership check: Include delivery, assembly, floor protection, instruction or membership, power, chain or strap care, seat rollers, wear parts, labor, and eventual removal.
Approve the exact home model only after its rail, sound, floor placement, storage method, parts support, and delivered cost work in the actual room.