
Tires & Wheels Buying Guide for Vehicle Fitment and Load Ratings
Fitment asks two questions: can the package carry the vehicle, and can it occupy the required space through motion? A wheel may clear the caliper on a lift yet contact under tolerance or heat, while a tire may support a catalog load only at different pressure or rim conditions.
Record placard, manual, wheel, and brake specifications, then weigh the loaded vehicle by axle. Use tire-maker load and inflation data for the exact size and construction, not a sidewall shortcut. Verify wheel rating and every hub, fastener, centering, offset, and rim interface. Model steering lock, suspension compression and droop, tire deflection, body roll, packed snow or mud, and traction-device space. After professional installation, inspect the complete envelope again under controlled loading.
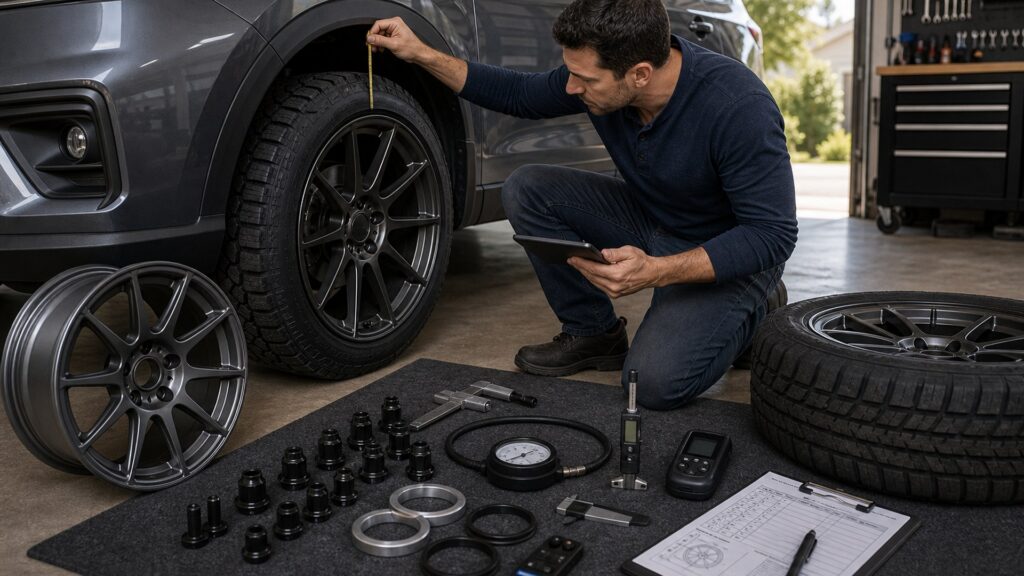
Buying framework
Verify the load chain and the space envelope separately
Capacity flows through tire, rim, wheel, fasteners, hub, axle, and vehicle; clearance must be proven through three-dimensional motion.
Establish the exact baseline: Capture placard, manual alternatives, wheel part and dimensions, brake package, hub, fasteners, TPMS, suspension, axle ratings, and current modifications.
Measure operating load: Weigh the actual loaded vehicle by axle and, where material, by corner; include passengers, cargo, accessories, hitch, and tongue load.
Calculate every capacity link: Verify tire capacity at approved cold pressure and rim, wheel rating, fastener and hub suitability, GAWR, and load distribution without using the weakest link twice.
Map the dynamic envelope: Measure inboard, outboard, radial, caliper, steering, suspension, body, hose, liner, chain, and service clearances under representative movement.
Who this is for
Fitment risk changes with vehicle configuration
Stock commuters, staggered performance cars, heavy trucks, modified suspension, and wheel-spacer applications require different evidence.
Stock replacement buyers: Match placard or manufacturer-approved size, load, speed, pressure, wheel, and TPMS with minimal system uncertainty.
Staggered or AWD vehicles: Preserve approved front-rear circumference, position, rotation limits, load, and replacement matching to protect handling and driveline behavior.
Loaded trucks and SUVs: Use travel-ready scale weights, LT or P-metric application guidance, wheel and axle ratings, towing tongue load, and rear overhang effects.
Modified suspension vehicles: Recheck steering axis, travel, alignment, fender and liner position, brake hoses, joints, calibration, and bump or droop after every geometry change.
What to pay attention to
Fitment specifications that close the load and geometry proof
An application claim is strong only when exact part dimensions, load data, vehicle interfaces, and full-motion clearance are documented.
Load Chain
Placard, measured axle or corner load, tire at pressure, rim, wheel, fasteners, hub, axle, and thermal duty.
Space Envelope
Section, diameter, offset, brake barrel, caliper, spokes, suspension, steering, body, hoses, chains, deflection, and tolerances.
Tire-rim compatibility: Confirm exact tire size, construction, approved rim-width range and contour, load data, speed capability, pressure limits, and intended service.
Wheel dimensional record: Obtain actual diameter, width, offset, center bore, bolt circle, mounting pad, backspacing, spoke and barrel profiles, valve location, and load rating.
Hub and fastener system: Verify pilot design, clean mounting faces, stud or bolt size and engagement, seat geometry, hardware material, torque procedure, and spacer approval if relevant.
Brake and suspension clearance: Use templates or direct measurement for caliper and barrel, spoke face, balance weights, steering joints, strut, control arms, springs, and hoses with tolerance.
Electronic and spare effects: Check TPMS, wheel-speed relationship, ABS and stability behavior, AWD circumference, speed display, driver assistance, spare diameter, and temporary-use limitations.
Avoid these traps
Fitment calculations that prove only one favorable condition
Catalog width, unloaded axle math, or static photos can hide pressure, tolerance, deflection, heat, articulation, and asymmetric loading.
Dividing axle rating by two blindly: Actual side-to-side loading may differ, and tire capacity must align with approved pressure, rim, construction, speed, and service conditions.
Using advertised wheel offset without measuring width: Offset interacts with actual bead-seat width, flange, spoke and barrel shape; identical offset does not create identical clearance.
Treating spacers as simple correction: Spacers change fastener, hub, centering, leverage, thread engagement, fender position, inspection, and service requirements and need documented approval.
Checking clearance with suspension hanging: Droop alone misses compression, steering, roll, tire deflection, loaded ride height, heat, packed material, and body movement.
Decision guidance
Reject any package with an unverified capacity or interference link
A visually compatible package is not acceptable until the weakest load component and tightest dynamic clearance are known.
If tire capacity depends on higher pressure: Confirm the exact tire data, wheel pressure capability, vehicle approval, ride and grip consequences, TPMS reference, and axle need before proceeding.
If wheel rating is undocumented: Select a wheel with traceable application and load evidence; appearance, material, spoke count, or claimed strength cannot substitute for a rating.
If brake clearance is marginal: Use an exact template and tolerance, account for weights and heat, or choose a wheel with documented clearance rather than adding an improvised spacer.
If loaded tires contact during travel: Stop and correct size, wheel position, suspension or body interface through approved methods; rubbing is evidence of failed fitment, not routine break-in.
Ownership & compatibility
Reverify fitment after installation and loading changes
Pressure, settling, alignment, cargo, towing, suspension wear, impacts, tire growth, and wheel service can change the original clearance and load state.
Create a fitment record: Save scale tickets, tire and wheel data, pressures, measurements, templates, TPMS, fasteners, alignment, clearances, photos, and installer results.
Inspect the first operating cycles: Check pressure, leakage, fastener procedure, rub marks, balance weights, brake contact, vibration, steering, liner movement, and TPMS after controlled use.
Reweigh after configuration changes: Repeat load and clearance validation after racks, batteries, towing, suspension, cargo, campers, wheel repairs, tire changes, or new typical passengers.
FAQ
Fitment and load-rating questions
These answers cover axle loads, pressure, load index, wheel rating, offset, spacers, brakes, AWD, and post-installation checks.
How do I determine the tire load needed for my vehicle?
Is the tire sidewall maximum load available at any pressure?
How can I verify an aftermarket wheel’s load rating?
What measurements are needed beyond bolt pattern?
Can wheel spacers safely fix an offset problem?
How much brake-caliper clearance is enough?
Why does AWD make tire fitment more sensitive?
Should tire load capacity exceed the axle rating?
What should I inspect immediately after installation?
Bottom line
Fitment is proven by the weakest load link and tightest moving gap
Use scale data, tire capacity at pressure, traceable wheel ratings, exact interfaces, and full-motion clearance before accepting an alternate package.
Trace the load: Measured demand must fit tire, rim, wheel, fastener, hub, axle, pressure, speed, and temperature limits.
Measure the envelope: Verify brakes, spokes, barrel, suspension, steering, body, hoses, deflection, chains, and operating tolerances.
Document and recheck: Keep the fitment record, inspect early cycles, and reweigh whenever vehicle load or geometry changes.
Reading Shortcuts
Move from the operating need to a documented load-and-clearance proof that can be installed and verified.
Decision Reminders
Keep the complete load-and-clearance proof in view while comparing tires and wheels.
- Baseline: Placard, brakes, hub, fasteners.
- Scale: Axle and side-to-side demand.
- Capacity: Exact tire at pressure and wheel.
- Interface: Rim, pilot, seat, engagement.
- Envelope: Motion, deflection, heat, chains.
- Record: Measure, inspect, and reweigh.
Glossary Snippets
Terms that separate useful performance from apparent compatibility.
When to Use a Top 10 Review
Use a product roundup only after the required performance and load-and-clearance proof limits are known.
- Problem defined: The visibility or mobility failure is specific.
- Vehicle mapped: Interfaces and limits are documented.
- Format chosen: The correct product family is settled.
- Evidence available: Finalists can be compared on relevant tests.
Have finalists already? Open a Comparison for a closer tradeoff.
When to Use a Comparison
Compare finalists that solve the same defined load-and-clearance proof need on the same vehicle.
- Application: Both match the exact vehicle and function.
- Performance: Evidence addresses the operating problem.
- Integration: Mounting and system effects are understood.
- Ownership: Inspection and service demands are acceptable.
Need a broader field? Use a Top 10 to form a shortlist.