
Tools & Garage Equipment Buying Guide for Torque, Clearance, and Access
A socket can match the fastener and still be the wrong tool. The body may be too wide for the recess, the ratchet may need more swing than the bay allows, or the handle may meet a frame rail before useful force develops. Removal can then demand more load than the compact access tool should carry.
Reassembly adds a second test: can a torque wrench reach the same fastener, stay aligned, and operate within its intended range? Choosing well means mapping the interface, the breakaway task, the working envelope, and the final tightening path together. That approach produces a smaller, more dependable kit than buying by maximum torque or set size.
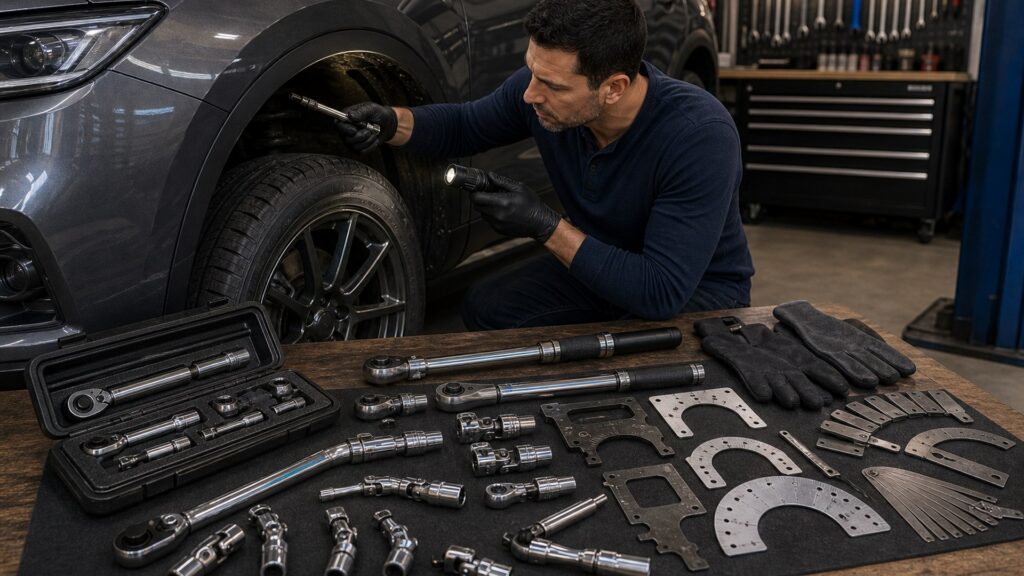
Buying framework
Map force and space before choosing the tool
Treat every difficult fastener as a three-dimensional problem. Record what must engage the hardware, how much controlled force is needed, and where both tool and hand can move.
Identify the exact interface: Confirm metric or SAE size and the required profile: six-point, twelve-point, Torx, external Torx, hex, triple-square, flare-nut, or another form. Note whether the fastener sits on a long stud, requires a thin wall, or has limited flank engagement because corrosion or prior damage has altered it.
Separate breakaway from final torque: A seized bolt may need penetrating time, heat under an approved procedure, a breaker bar, or impact force; none of those establishes the installation value. Plan a controlled removal path and a separate tightening tool that can reach the fastener at the specified torque and sequence.
Draw the working envelope: Measure recess diameter, depth, axial reach, handle sweep, and nearby hoses, harnesses, shields, or castings. Include the operator's hand and the movement needed to release the ratchet. A flexible head solves a different obstruction than a shallow socket or shorter extension.
Count every joint in the stack: Socket, extension, universal joint, drive reducer, and crowfoot each add length and movement. More joints can reach around an obstacle but make it harder to keep the interface square. Use the shortest, simplest stack that reaches cleanly and remains suitable for the expected load.
Prove the reassembly path early: Before loosening the fastener, mock up the torque wrench, socket, and any approved adapter. Check that the wrench can sweep, signal, and be read without contacting surrounding parts. If it cannot, find the vehicle maker's alternate method or the correct specialty tool before proceeding.
Who this is for
Choose depth where your repairs create access problems
Different repair patterns stress different parts of the tool system. Invest around the fasteners, clearances, and control requirements you repeatedly encounter.
Routine-maintenance owners: Wheel fasteners, drain plugs, batteries, filters, and covers usually reward a straightforward six-point socket set, useful extensions, a breaker bar where appropriate, and torque coverage for common service values. Avoid oversized cases that sacrifice readable organization for duplicated pieces.
Compact-engine-bay DIYers: Transverse engines and crowded accessory drives often make head thickness, ratchet arc, shallow sockets, flexible handles, and controlled extension length more important than ultimate output. Add low-profile tools only after identifying the exact obstruction they must bypass.
Brake and suspension workers: Larger or corroded fasteners can require robust six-point impact sockets, breaker bars, penetrating preparation, and vehicle-specific holding tools. Reassembly may span several torque ranges, so one broad wrench can be less practical than two instruments sized to different fastener groups.
Restoration and fabrication users: Mixed standards, damaged hardware, deep studs, and irregular access justify specialty profiles, extractors, crowfeet, universal sockets, and duplicate common sizes. Keep modified or custom leverage methods separate from precision tightening and document nonstandard fasteners for future service.
What to pay attention to
Specifications that determine engagement and reach
Compare the dimensions and interfaces that matter at the fastener. A large rating cannot compensate for a socket that rocks, a head that will not enter, or a handle with nowhere to move.
Force Delivery & Fastener Engagement
Drive size, socket profile, wall construction, handle length, load rating, alignment, and torque range govern how securely and controllably force reaches the fastener.
Access Geometry & Working Envelope
Head depth, socket diameter, ratchet arc, articulation, extension length, reaction clearance, and hand space determine whether that force can be delivered in the vehicle.
Socket contact and outer diameter: Six-point sockets generally provide strong engagement on ordinary hex fasteners, while other profiles belong only where specified. Compare wall thickness and shoulder shape as well as nominal size; a thin-wall socket may enter a narrow counterbore that blocks a bulkier impact socket.
Drive size and tool scale: Quarter-inch tools favor light loads and small spaces, three-eighths drive covers much general automotive work, and half-inch drive supports larger sockets and higher loads. Choose by the procedure and available room, not by forcing every fastener onto one drive with reducers.
Ratchet head, arc, and backdrag: A smaller swing arc helps when handle travel is restricted, but head thickness and mechanism behavior matter too. Low backdrag can keep a nearly loose fastener moving instead of turning backward. Strength, serviceability, and sealed construction should be evaluated separately from tooth count.
Extensions and articulation: A straight extension moves the handle away from an obstruction; wobble ends and universal joints change the working angle. Check load suitability and keep angularity modest where control matters. An articulated stack that removes a bolt quickly may be unsuitable for final torque.
Torque range and indication: Place the specified value inside the instrument's documented working span and confirm units, direction, drive size, and signal style. Read the maker's guidance for pull location and pace. An inline crowfoot may change effective length and require the calculation described by the manufacturer.
Handle length and reaction clearance: Longer handles can reduce operator effort, yet they need more sweep and may contact bodywork or the floor. Short handles fit tight areas but demand more input force. Choose a length that allows stable body position and keeps the tool square throughout the movement.
Avoid these traps
Common torque-and-access buying errors
The wrong proxy can hide a poor fit. Maximum numbers, tooth count, or an adapter assortment should never replace a check against the actual fastener and workspace.
Buying by maximum torque: Peak output says little about low-speed control, socket fit, head size, or final tightening accuracy. Determine what must be loosened and what must be torqued, then choose separate tools when speed and measurement call for different designs.
Treating every adapter as harmless: Reducers and universal joints add leverage, movement, and potential misalignment. Crowfeet can alter effective torque-wrench length depending on orientation. Use adapters only within documented limits and follow the relevant calculation or technique rather than stacking parts until something reaches.
Using a torque wrench as a breaker bar: A precision instrument should not absorb an unknown breakaway load unless its manufacturer explicitly permits that use. Free the fastener with an appropriate hand or impact tool, then use the torque wrench for the controlled installation task it was selected to perform.
Assuming impact sockets fit everywhere: Impact sockets are designed for impact loads but are often physically larger than chrome hand sockets. Confined recesses may require a slimmer hand-tool path, while impact use still demands the correct impact-rated socket. Plan access and load rather than treating one socket type as universal.
Checking access only during removal: A compact ratchet may extract the bolt even though the torque wrench cannot enter for installation. Confirm the tightening path, any sequence constraints, and the room needed to observe the wrench's indication before the component is disturbed.
Decision guidance
Build the access stack for the actual obstruction
Choose the simplest tool path that engages fully and leaves room for controlled movement. Add articulation or specialty geometry only when a specific obstruction demands it.
If the recess is narrow: Start with the specified-profile socket in a known thin-wall or low-profile design and verify its load suitability. A smaller drive may reduce bulk for lighter fasteners, but do not use a reducer to push an undersized tool beyond its intended demand.
If handle swing is limited: Compare fine-arc ratchets, ratcheting wrenches, flex heads, and pass-through designs. Pick the one that keeps the fastener interface square and gives the user's hand a stable path. Do not trade all handle leverage for a mechanism that technically advances but cannot break the fastener free.
If the fastener is recessed or behind an obstacle: Use a straight extension when it relocates the handle cleanly. Choose wobble or universal access only for the angle required, and verify whether the articulated setup is appropriate for installation. A vehicle-specific offset wrench or universal socket may be more controlled than a long adapter chain.
If removal load is high: Pair a robust breaker or impact path with the correct socket and safe body position. Protect nearby hoses, sensors, and bodywork from sudden release. After removal, switch to clean threads, specified preparation, and an accurately ranged torque tool for assembly.
If final torque cannot be reached directly: Look for the service procedure's approved tool or method. A crowfoot, torque adapter, or alternate tightening technique may be valid only with a defined orientation or calculation. If the procedure cannot be executed reliably in the available space, qualified service is the safer choice.
Ownership & compatibility
Keep high-load interfaces and precision tools dependable
Wear often appears first at the connection points that transfer force. Inspect those areas and keep torque instruments under their own storage and service routine.
Inspect drives, sockets, and pivots: Remove tools from service when square drives, socket openings, retaining features, flex pivots, or adapter joints show cracks, deformation, excessive play, or other damage. Clean packed debris from profiles so the tool can seat fully on the next fastener.
Follow torque-tool instructions: Store, exercise, charge, reset, or calibrate the instrument exactly as its maker specifies for that design. Preserve records when accuracy matters. Do not apply one brand's lowest-setting rule or service interval to every click, beam, split-beam, or electronic wrench.
Separate load classes visually: Keep impact sockets and adapters easy to distinguish from hand-only pieces, and prevent mismatched drive reducers from becoming the default. Labeled rails or foam layouts also reveal when a key low-profile or specialty profile is missing.
Protect the mechanism from misuse: Use ratchets for turning rather than as substitute hammers, pry bars, or breaker bars. Keep moving heads and release buttons clean, and follow lubrication or rebuild instructions where service is supported. A smooth mechanism improves control but does not restore a worn fastener interface.
FAQ
Torque, clearance, and access FAQ
Practical answers for choosing and using automotive fastener tools in confined spaces.
Is a higher-tooth-count ratchet always better in tight spaces?
Should I buy six-point or twelve-point sockets for automotive work?
Can I use chrome sockets with an impact wrench?
Does an extension change the torque applied by a torque wrench?
What torque-wrench range should I choose?
When is a flex-head ratchet useful?
Can an impact wrench replace a breaker bar?
How do I reach a fastener when the torque wrench will not fit?
Are thin-wall sockets weaker than standard sockets?
Bottom line
Prove engagement, movement, and final torque
The right tool must fit through the complete job, not merely touch the fastener. Make removal and reassembly two explicit checks.
Match the interface first: Use the exact fastener profile and a socket or wrench that seats fully without excessive play.
Map the entire tool envelope: Account for socket diameter, head thickness, handle sweep, articulation, extensions, the user's hand, and nearby components.
Separate speed from measurement: Choose an appropriate breakaway method, then reserve the accurately ranged torque tool for controlled installation.
Keep the stack simple: Every extra joint adds movement and length. Use specialty access only when it solves a defined obstruction and remains supported by the procedure.
Reading Shortcuts
Jump to the torque or access decision you need to solve.
Decision Reminders
A compact check before loosening a confined fastener.
- Confirm the profile: Size alone does not identify the required contact shape.
- Plan breakaway: Use a suitable load tool rather than sacrificing the precision wrench.
- Measure the pocket: Include socket wall, head, sweep, and hand clearance.
- Count the joints: Every extension or articulated adapter changes control.
- Mock up reassembly: Prove the torque wrench can reach and signal.
- Check tool instructions: Ratings and adapter methods are product-specific.
Glossary Snippets
Terms that clarify automotive fastener access.
When to Use a Top 10 Review
Use a ranked list after you know the required tool type, interface, load, and access envelope.
- The drive size is known: Screen candidates at the correct scale.
- The pocket is measured: Reject heads and sockets that cannot enter.
- The torque range is defined: Compare instruments around required values.
- The tool class is settled: Rank ratchets, wrenches, or adapters within one job.
Need to choose between two access designs? Open a Comparison.
When to Use a Comparison
Use a side-by-side review once both tools reach the fastener and support the expected load.
- Compare head geometry: Look at thickness, arc, articulation, and release layout.
- Compare control: Evaluate backdrag, handle shape, indication, and alignment.
- Compare service: Check rebuild parts, calibration support, and warranty process.
- Compare the complete stack: Include sockets, adapters, extensions, and storage.
Still defining the tool class? Start with a Top 10.