
Vehicle Batteries Buying Guide for Vehicle Batteries Fitment and Compatibility
Battery fitment is more than finding a case that drops into the tray. The posts must align with factory cables and fuse hardware, the hold-down must capture the intended base or top bar, the vent must connect correctly, and the chemistry must suit the charging strategy.
Photograph the installed configuration before disconnection, reconcile catalogs with the original label and measured enclosure, and confirm registration or coding tools in advance. If any physical, electrical, or software interface remains unresolved, the battery is not yet a compatible choice.
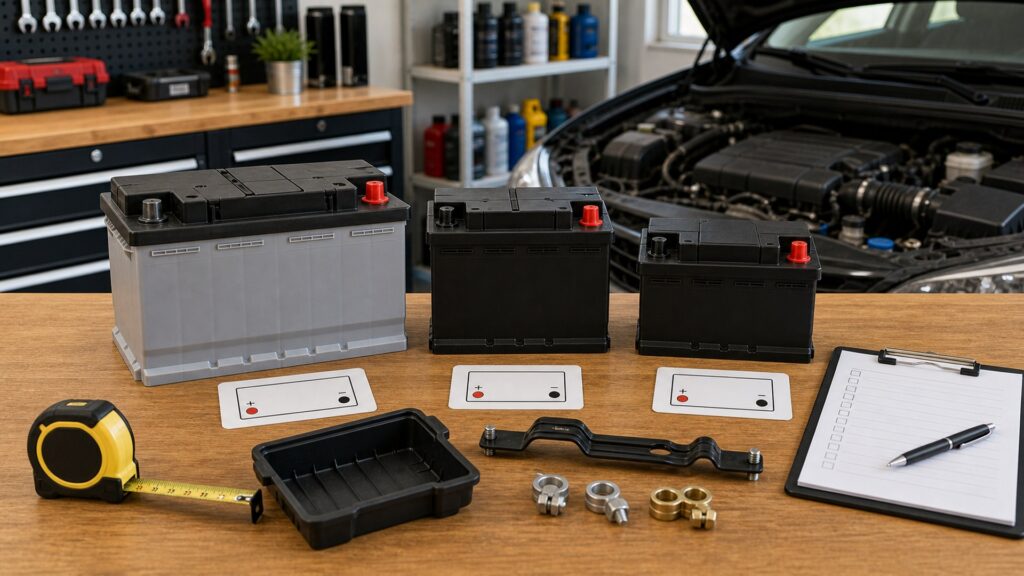
Buying framework
Prove battery compatibility before disconnecting the old unit
Battery fitment is a chain of mechanical, electrical, chemical, and software checks. Confirm the factory label and enclosure, then resolve case, polarity, posts, hold-down, venting, technology, ratings, sensors, and registration.
Capture the installed configuration: Photograph the label, positive and negative cable approach, posts, fuse block, sensor, hold-down, tray, vent tube, thermal cover, and nearby clearance. Record VIN, engine, start-stop equipment, production date, and original number before disturbing anything.
Resolve catalog overlaps: Compare VIN-level listings, build notes, OE numbers, group substitutions, terminal figures, dimensions, technology, capacity, CCA, vent locations, and registration notes. When sources disagree, keep the old battery installed until the conflict is explained.
Measure the complete physical envelope: Check case length, width, base, total height including posts, handle or cover interference, clamp ledges, cable reach, fuse-block mounting, hood clearance, and service access. Space alone does not prove retention or electrical safety.
Match the electrical and chemical system: Preserve polarity, post type, nominal voltage, required flooded, EFB, or AGM design, CCA, reserve, capacity, start-stop cycling, auxiliary battery role, sensor placement, and charging strategy.
Plan the changeover and setup: Follow safe cable sequence, memory and key instructions, lifting, vent transfer, clamp torque, terminal protection, sensor routing, battery registration, coding, adaptations, relearns, charging tests, and recycling. Confirm tools and power support before disconnection.
Who this is for
Common battery fitment conflicts need different proof
Polarity variants, European base clamps, trunk ventilation, start-stop technology, and dual-battery systems can make superficially similar batteries incompatible.
Same-size batteries with opposite polarity: Cable approach and fuse-block position determine which terminal layout belongs. Never stretch or cross cables over the case; verify positive orientation from the installed configuration and the maker's terminal figure.
European-style case and base-clamp applications: Match EN or BCI references, total height, recessed posts, base ledge type, clamp notch, vent ports, and thermal jacket. A case that occupies the tray can still miss the retention geometry.
Trunk or cabin-mounted batteries: Confirm external vent routing, elbow and port position, unused-port plug, cover clearance, battery sensor, remote jump points, trim sequence, and approved technology. Restore every enclosure part before releasing the vehicle.
Start-stop AGM or EFB vehicles: Use the specified cycling technology, capacity, CCA, sensor routing, auxiliary arrangement, and registration. A conventional flooded unit can share dimensions yet remain incompatible with the duty and charging algorithm.
Dual-battery and auxiliary systems: Identify each battery's function, chemistry, rating, isolation or charging path, age relationship, sensor, and synchronization procedure. Do not assume the larger battery or the one nearest the engine is the only failed unit.
What to pay attention to
Fitment fields that must all agree
Compatibility requires a matching envelope, polarity, terminals, retention, ventilation, chemistry and ratings, and battery-management setup; passing six of seven is not enough.
Physical proof
Dimensions, height, polarity, posts, cables, fuse block, hold-down, vent, shield, and clearance.
System proof
Technology, CCA, reserve, capacity, cycling, sensors, auxiliary units, registration, and charging behavior.
VIN and original label: Use vehicle identity with the installed technology, group or dimensions, CCA, capacity, date, venting, and original number. The label is evidence, but current supersessions and service information still need review.
Case dimensions and clearance: Measure length, width, case height, post height, base profile, handle, terminal covers, heat shield, tray, and hood or trim clearance. Include room for tools, cable removal, and the factory insulating jacket.
Polarity and cable approach: Confirm positive and negative positions while viewing the posts from the defined orientation. Check cable length, routing, fuse-block support, sensor location, protective covers, and the risk of accidental chassis contact.
Terminal type and attachments: Match tapered top posts, side terminals, threaded studs, auxiliary posts, diameter, spacing, orientation, and attached distribution hardware. Adapters can add height, resistance, looseness, and warranty questions unless explicitly approved.
Hold-down geometry: Verify base ledges, notches, top bar, wedge, bolts, tray condition, and torque. Retention must secure the battery without deforming the case or allowing movement under vibration and impact.
Vent port and enclosure hardware: Match port side, elbow, hose diameter, routing, unused-port plug, cover, drain, and thermal shield. Enclosed locations demand exact restoration of the vehicle's gas-management path.
Technology, ratings, and setup: Keep required flooded, EFB, or AGM construction together with voltage, capacity, CCA, reserve, start-stop duty, sensor, registration, coding, and charging verification. Do not substitute one field independently.
Avoid these traps
Fitment errors that are invisible in a product thumbnail
Battery mistakes commonly come from trusting a group label, forcing cables, improvising clamps, ignoring ventilation, or assuming equal voltage means equal technology.
Using dimensions as the entire fit test: A case can fit the tray while polarity, posts, base clamp, vent, covers, cables, or hood clearance fail. Compare every interface before treating a nearby group size as a substitution.
Stretching cables to reach reversed posts: Cable strain can damage terminals, insulation, sensors, fuse blocks, and routing. Select the correct polarity and terminal orientation rather than crossing leads or moving protective hardware.
Shimming or omitting the hold-down: Wood, foam, wedges, or a loose clamp do not reproduce the designed retention. Use the correct battery base and factory hardware; repair a corroded tray or missing bolt before installation.
Plugging the wrong vent port: Some batteries have ports on both ends but require one hose connection and one closure plug. Follow battery and vehicle instructions so the gas path is restored outside the enclosure.
Skipping registration because the car starts: Starting proves basic connection, not correct energy-management setup. Unregistered type or capacity can alter charging strategy, warnings, state-of-charge estimation, and battery life on vehicles that require the procedure.
Decision guidance
Resolve the conflict that created the fitment question
Choose only after the installed battery, vehicle data, catalog notes, and measured enclosure point to the same physical and electrical configuration.
If two catalogs list different groups: Compare OE number, exact dimensions, polarity, terminal figure, hold-down, vent location, technology, and build notes. Contact an accountable supplier or use service information rather than ordering both and testing by force.
If a larger case appears to fit: Verify tool access, cable slack, fuse block, post and hood clearance, thermal cover, clamp engagement, weight, and approved substitution. Extra capacity is not useful when retention or service safety is compromised.
If AGM is offered as an upgrade: Proceed only when the vehicle supports the chemistry, charging strategy, venting, capacity, and registration. Price the setup and warranty; do not call equal voltage and dimensions complete compatibility.
If the battery is mounted inside the body: Prioritize the exact vent system, cover, spill and gas management, terminal protection, remote jump points, and trim procedure. Stop when the enclosure hardware cannot be restored correctly.
If battery-management setup is uncertain: Keep the current unit connected while confirming registration, coding, memory support, sensors, auxiliary batteries, and required tools. A qualified installer is preferable to improvising after power has already been removed.
Ownership & compatibility
Preserve a reproducible battery fitment record
Photographs and setup data make the next replacement safer and reduce dependence on a generic catalog match.
Photograph every interface: Save label, posts, cable approach, fuse block, sensor, hold-down, tray, vent, heat shield, and clearance before and after installation. Include the part and date code.
Record exact dimensions and ratings: Keep case and post height, group reference, polarity, terminal type, chemistry, CCA, reserve, Ah, weight where useful, seller, receipt, installation date, mileage, and warranty.
Document changeover and setup: Note cable sequence, memory procedure, terminal and hold-down torque, vent connection, sensor routing, registration, coding, relearns, old-battery recycling, and charging-system results.
Investigate repeat discharge: Save key-off draw, alternator, starter, cable, ground, sensor, auxiliary-battery, and state-of-charge findings. Repeated low charge is not proof that the physical battery fitment was wrong or right.
FAQ
Vehicle battery fitment FAQ
Answers about group substitutions, polarity, terminal types, hold-downs, venting, AGM, and registration.
Why can two catalogs list different battery groups?
Can battery cables be stretched to reach opposite terminals?
Is battery height measured to the top of the posts?
Can terminal adapters solve a fitment mismatch?
Why is the battery hold-down important?
How do I choose the correct vent connection?
Can AGM and flooded batteries share the same group size?
What happens if battery registration is skipped?
What should be checked before closing the battery compartment?
Bottom line
Battery compatibility is an all-interfaces test
The replacement belongs only when case, cables, retention, venting, chemistry, ratings, sensors, and setup agree with the exact vehicle.
Capture the original: Photograph labels, dimensions, polarity, posts, clamp, vent, sensor, and covers.
Resolve every interface: Check enclosure, cables, terminals, hold-down, venting, technology, and ratings.
Plan the setup: Confirm safe changeover, registration, coding, auxiliary units, and relearns.
Verify before trim: Test connections, starting, charging, warnings, retention, and gas routing.
Reading Shortcuts
Confirm application and condition first.
Decision Reminders
Checks to complete before committing.
- Confirm the exact application: Cross-check vehicle, engine, housing, and original part.
- Preserve removed-part clues: Contamination and damage can identify another fault.
- Keep the work clean: Keep downstream openings protected.
- Follow the procedure: Respect pressure, fluids, torque, priming, and resets.
- Inspect interfaces: Seals, caps, connectors, threads, and fittings must agree.
- Verify before release: Check leaks, warnings, starting, idle, and road behavior.
Glossary Snippets
Terms used in this decision.
When to Use a Top 10 Review
Use rankings after application and service scope are documented.
- Application confirmed: Filter with exact engine and interface evidence.
- Duty identified: Compare parts for the real interval and environment.
- Evidence published: Rank construction, testing, traceability, and support.
- Job scope complete: Include seals, fluids, tools, and verification.
Already down to 2–3 options? A Comparison is usually faster.
When to Use a Comparison
Compare finalists for the same verified application.
- Interfaces: Match dimensions, seals, valves, fittings, and connectors.
- Performance evidence: Compare documented efficiency, capacity, and service claims.
- Included content: List every seal, cap, sensor, boot, and fitting.
- Installed outcome: Price fluids, labor, priming, disposal, and downtime.
Still building a shortlist? Start with a Top 10.