
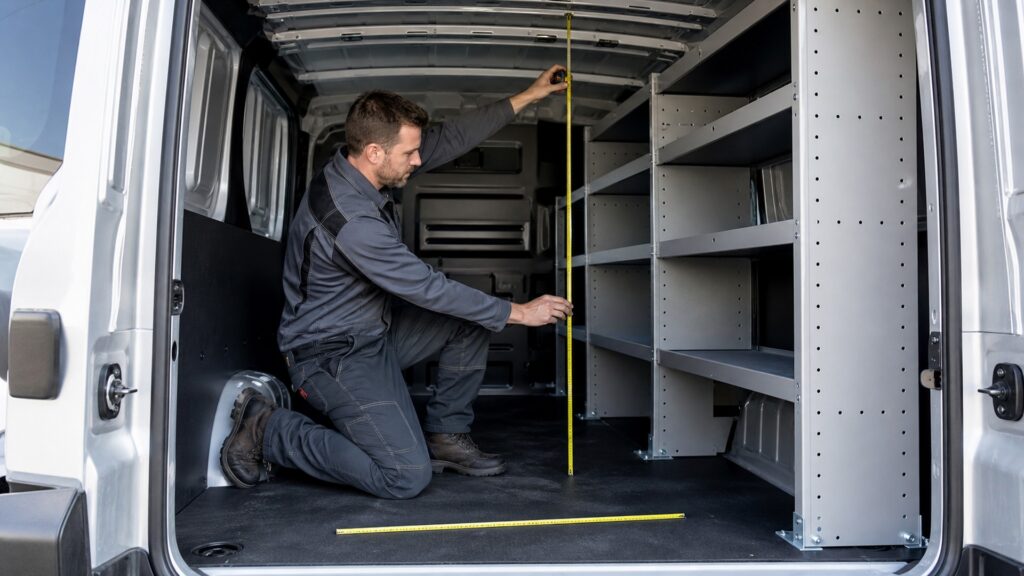
Why Cargo Vans Fitment Matters

Cargo-van fitment determines whether shelves, partitions, racks, and powered equipment can be installed and used safely in the exact van. An accessory that fits inside the compartment may still conflict with doors, load restraints, structural mounting requirements, wiring, or protected components beneath the floor.

Good fitment checks the whole installation: vehicle compatibility, attachment, clearance, mass, electrical supply, and service access. A shelf that leaves just enough room for a crate while parked is a poor match if the crate cannot be loaded, secured, or removed during the job.

By: Review Streets Research Lab
Updated: October 7, 2026
Explainer · 8-12 min read
cargo vans explainer hero image for Review Streets
What You'll Learn

Check More Than Whether Equipment Fits Inside

Evaluate the installation from vehicle identification through handover.

  • Which vehicle details determine compatibility
  • Why mounting locations and attachment methods matter
  • How clearances affect everyday use
  • Why installed equipment consumes carrying allowance
  • What to verify before accepting the finished van

Tip: Give the installer the exact vehicle details and a realistic load list before choosing equipment.

Definitions

Six Fitment Checks for a Working Van

Dimensions are only one part of compatibility.

Vehicle compatibility

Vehicle compatibility means equipment is intended for the exact vehicle version and installation conditions.

  • Example: a partition specified for the van’s body and seating arrangement
  • Check: model year, wheelbase, roof, powertrain, and equipment specification
  • Limit: a shared model name does not prove compatibility

Mounting provision

A mounting provision is a location or system intended to accept an approved attachment.

  • Example: specified fixing points for a supported shelving installation
  • Check: vehicle and equipment installation instructions
  • Limit: an accessible panel is not automatically a structural anchor

Operating clearance

Operating clearance is the space needed for equipment, doors, and loads to move as intended.

  • Example: a drawer opening without striking the side door
  • Check: full movement and the actual loading path
  • Limit: static clearance alone may miss a working obstruction

Installed mass

Installed mass is the weight added by fitted equipment and its associated components.

  • Example: racks, mounting hardware, and a power system
  • Check: completed vehicle and axle loads
  • Limit: empty shelves still consume carrying allowance

Electrical integration

Electrical integration connects powered equipment through a suitable supported supply arrangement.

  • Example: an auxiliary tool-charging installation
  • Check: power demand, connection provisions, protection, and service instructions
  • Limit: an available wire or socket does not prove adequate capacity

Service access

Service access is the space needed to inspect and maintain relevant components after installation.

  • Example: access to specified vehicle service points beside shelving
  • Check: maintenance instructions and removal requirements
  • Limit: equipment can obstruct future service without obstructing daily loading

Tip: Assess each accessory in the finished arrangement, including the cargo it will support.

Identification

Start with the Exact Vehicle and Equipment

Record the model year, body length, roof height, powertrain, and relevant options. Obtain vehicle-specific upfitter guidance and the accessory supplier’s compatibility information. Similar-looking vans can have different floors, mounting restrictions, or systems under the body. A used rack from another van needs the same checks as a new one.

  • Match the equipment specification to the actual van.
  • Check instructions for both vehicle and accessory.
  • Resolve missing or conflicting information with the suppliers.

GM’s body-builder resources are organized by vehicle and model year. That level of specificity is more useful than a general claim that an accessory fits cargo vans.

Reference: GM body-builder manuals.

Attachment

Use Supported Mounting Methods

Equipment must remain attached under the conditions for which its installation is designed. Do not treat thin trim, floor coverings, or a convenient hole as evidence of suitable support. The installer needs the specified attachment method and awareness of components behind or beneath the mounting area. Structural and electrical changes require appropriate expertise.

  • Identify supported attachment locations.
  • Account for hidden wiring and other protected systems.
  • Follow the exact installation instructions.

The eSprinter body-equipment guidance includes restrictions around the high-voltage battery and its mountings. Those model-specific restrictions show why a floor that looks clear from above may not be available for drilling.

Reference: Mercedes-Benz eSprinter body-equipment guidance.

Movement

Check Doors, Drawers, and the Loading Path

Lay out the equipment around the work rather than filling every available surface. Test the intended movement of doors, drawers, long tools, and bulky loads. Include room to reach restraints and remove items without dismantling the interior. A partition or shelf can reduce usable access even when its outer dimensions fit the body.

  • Open doors and equipment through their intended travel.
  • Try the widest or most awkward regular load.
  • Keep necessary restraints and access points reachable.

For example, a deep shelf near a side door may leave a walking gap but prevent a wide case from turning into the van. A dimensional drawing should be checked against that actual maneuver.

Capacity and power

Assess the Equipped Van as a Complete System

Shelves, partitions, roof equipment, batteries, and stock all contribute to the finished load. Check overall and axle limits with the intended people and supplies aboard. Powered equipment also needs an appropriate supply and protection arrangement. Do not assume the vehicle’s traction battery or standard outlet is available for any accessory load.

  • Include installation hardware and permanently carried stock.
  • Verify load distribution as well as total mass.
  • Confirm the supported electrical connection and demand.

Ford’s loading guidance supports assessing the loaded vehicle against its ratings. Equipment choice and placement should be settled with those constraints visible, before the remaining space is filled with stock.

Reference: Ford vehicle loading guidance.

Handover

Accept the Installation with Evidence and a Working Check

Keep the equipment specification, installation documentation, and maintenance instructions with the vehicle records. Verify that doors latch, drawers retain their contents as intended, access remains usable, and relevant systems operate properly. Confirm what needs periodic inspection and who will address defects. A tidy appearance does not establish compatibility.

  • Try the intended loading and retrieval tasks.
  • Record installed equipment and relevant limits.
  • Confirm inspection and service access requirements.

If an equipment change later blocks a service point or alters the load arrangement, reassess that change. A completed installation is a defined configuration, not permanent approval for every future addition.

Quick Reality Check

A Visual Fit and a Verified Installation

Equipment can occupy the space without being suitable for the vehicle.

A visual fit establishes

The item can be placed in the visible compartment.

Its outer dimensions do not show an obvious static collision.

Installation checks establish

Supported attachment, clearances, and access for the exact vehicle.

Acceptable completed loading and a suitable power arrangement where needed.

Common Myths

Common Fitment Mistakes

Avoid assumptions that become expensive after installation.

If the rack fits inside, it fits the van

Attachment, movement, loading, and protected systems also matter.

Any existing hole is a suitable fixing point

Use the mounting provisions and methods specified for the installation.

Empty equipment does not affect payload

Its mass is part of the completed vehicle before stock is added.

A powered accessory can use any convenient supply

Confirm the exact supported electrical arrangement and its limits.

Tip: Resolve compatibility before cutting, drilling, wiring, or ordering a complete interior.

FAQ

Questions About Cargo-Van Fitment

Checks that help prevent an unsuitable installation.

What details should an installer receive?

The exact vehicle version and powertrain, intended equipment, representative load, and the way the van will be used.

Can equipment from another van be reused?

Possibly, but verify its condition and compatibility with the new vehicle and mounting instructions first.

Why check axle loads after fitting shelves?

Equipment position and stock distribution can burden an axle before the total vehicle limit is reached.

Do electric vans need different fitment checks?

Their specific instructions may include protected high-voltage components and different mounting or electrical provisions. Use the exact model guidance.

What records should stay with the van?

Equipment specifications, installation and maintenance instructions, relevant limits, and documentation of later changes.

Bottom Line

Fitment succeeds when equipment attaches correctly, remains usable, and works within the exact van’s limits.

Verify the complete installation, including cargo access, load distribution, electrical needs, and future maintenance.

Next Steps

Go Deeper or Compare Your Options

Use these Review Streets paths to compare related categories and practical next decisions.

Cargo-Van Design

Consider how the interior’s purpose affects its arrangement.