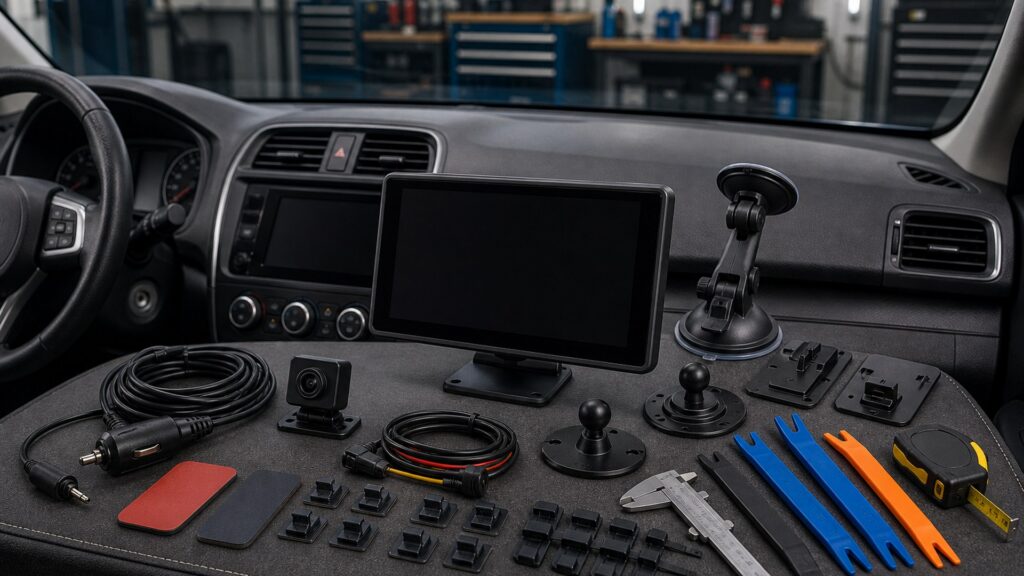
Driving Displays Buying Guide for Vehicle Compatibility Checks
Vehicle Compatibility Checks changes the way driving displays should be judged. VIN match, trim differences, mounting points set the early limits, while use-case match, mounting work, and long-run expense decide whether the purchase stays useful after the first weekend.
Use this guide to screen driving displays through a practical buyer lens. It covers who should buy what, which specs deserve attention, where shoppers waste money, and how care routine affects long-term value.
Buying framework
How to think about buying driving displays for vehicle compatibility checks
A good shortlist begins with the conditions around vehicle compatibility checks. Turn those conditions into vehicle details, surface needs, access limits, budget limits, and support expectations before comparing individual options.
Map VIN match: For vehicle compatibility checks, VIN match is not a side detail. It tells you whether the display needs a simple, upgraded, or professional-grade path.
Test trim differences against the vehicle: Use the actual vehicle, surface, trim, workspace, or route as the filter. A strong driving display should fit those limits without forcing fragile workarounds.
Treat mounting points as a risk signal: If mounting points is uncertain, slow down and gather better information. A rushed match can create returns, rework, diagnostic confusion, or avoidable labor.
Budget beyond connectors: Include tools, hardware, cleaners, wiring, towels, storage, calibration, or labor where relevant. The cheapest driving display can become expensive once the missing pieces appear.
Think past return policy: Look at service access, refill needs, warranty rules, update support, and replacement timing. The better vehicle compatibility checks buy remains manageable after the first use.
Who this is for
Pick the driving displays path that matches your situation
Different shoppers need different margins. Choose by the vehicle, the condition of the job, the tools available, and how much risk you can absorb if the first pick misses.
Vehicle Compatibility Checks first-timers: Choose forgiving options with clear instructions, obvious compatibility notes, and room for small mistakes. This path favors confidence over maximum capability.
Cost-control buyers: Screen the shortlist by long-run expense, not sticker price alone. Returns, labor, extra supplies, and downtime can outweigh a small discount.
Hands-on DIY owners: Prioritize access, instructions, safe working room, and tool requirements. A DIY-friendly driving display should make the process understandable before anything comes apart.
Repeat-use shoppers: Look for durable materials, consistent results, and easy replenishment. Repeated vehicle compatibility checks use exposes weak packaging, unclear fit notes, and poor support.
Long-term planners: Favor documented standards, parts availability, service notes, and warranty clarity. The best driving displays can be maintained without starting over every season.
What to pay attention to
Which driving displays specs actually matter
Specs matter when they change the outcome through a vehicle compatibility checks lens. Treat numbers and claims as clues, then connect them to the vehicle, the surface, the install path, or the driving routine.
Specs that affect feel
screen brightness, glare control, mount stability, alert timing, menu clarity, and driver distraction.
Specs that affect capability
display size, sensor inputs, camera support, phone integration, power wiring, firmware support, and vehicle compatibility.
Vin Match: Use VIN match to decide whether the category even fits your plan. If the requirement is fuzzy, write down the vehicle details before shopping.
Trim Differences: Trim Differences affects how easy the display is to use repeatedly. Compare real-world limits, not only the best-case claim.
Mounting Points: When mounting points matters, documentation becomes part of the product. Look for clear fit charts, use limits, preparation steps, or calibration notes.
Connectors: Connectors often decides whether the purchase feels smooth or irritating. Give extra weight to options that reduce repeated setup friction.
Often overhyped: Big ratings, glossy bundles, and premium labels can distract from use-case match. For vehicle compatibility checks, practical evidence beats broad marketing language.
Avoid these traps
Common mistakes people make when buying driving displays
Most regret comes from skipping one of the unglamorous checks: fit, condition, access, support, or upkeep. Those checks become especially important through a vehicle compatibility checks lens.
Treating VIN match as universal: A recommendation for another vehicle, surface, climate, or workload may not transfer. Tie the advice back to your vehicle compatibility checks situation.
Buying past the real need: Extra strength, harsher chemistry, larger screens, or higher ratings can add complexity. A balanced choice can work better when the job is narrow.
Forgetting mounting work: Tools, prep, wiring, cure time, lifting access, or calibration can decide whether the purchase is realistic. Understand the process before ordering.
Leaving care routine out: Consumables, updates, towels, hardware, inspections, and replacement pieces keep the display useful. Budget for them at the start.
Reading reviews too broadly: Prioritize owner feedback that matches trim differences, mounting points, and vehicle compatibility checks. Broad praise is less useful than a similar use case.
Decision guidance
Which driving displays choice is right for vehicle compatibility checks
Use the vehicle details, the workload, and your tolerance for rework to choose between simple, upgraded, bundled, and professional paths.
Choose the simple proven option if: The job mainly depends on VIN match and trim differences, and you want fewer variables. This path keeps risk and setup time lower.
Choose the upgraded option if: Mounting Points or connectors will matter often enough to justify extra cost. The upgrade should solve a real limit, not just look better.
Choose professional help if: The work touches safety, wiring, paint correction, calibration, lifting, or warranty-sensitive steps. Expertise can cost less than rework.
Choose a bundle if: Every included piece supports vehicle compatibility checks. Skip bundles that pad the box with weak accessories or duplicate supplies.
Pause if: Use-Case Match, diagnostic cause, surface condition, or mounting work is unclear. Better information prevents buying the wrong driving display twice.
Ownership & compatibility
What you are really buying into long term
The purchase includes the item, the support trail, the supplies around it, and the way it behaves as the vehicle ages or the routine changes.
Record the match: Save model numbers, vehicle details, measurements, receipts, and notes tied to vehicle compatibility checks. Good records make returns and replacements easier.
Schedule care routine: Plan inspections, cleaning, updates, retightening, reapplication, or replacement before performance drops. Waiting until failure usually costs more.
Protect storage conditions: Heat, moisture, sunlight, dust, and loose hardware can damage driving displays. Storage is part of ownership, not an afterthought.
Read the exclusions: Warranty rules may exclude modified vehicles, commercial use, wear items, chemical misuse, or unapproved installs. Know those limits before relying on coverage.
Price the long-run expense: Include mount wear, cable routing, firmware updates, screen cleaning, app support, warranty terms, and theft visibility. This gives a clearer comparison than purchase price alone.
FAQ
Driving Displays buying guide FAQ
Quick answers to common shopper questions about choosing driving displays for vehicle compatibility checks.
What should I decide first when buying driving displays?
How do I avoid buying the wrong option?
Are premium options worth it?
When should I use professional help?
What costs should I include beyond the product?
What is the safest way to compare choices?
Bottom line
The simplest way to choose driving displays for vehicle compatibility checks
Choose the option that fits the vehicle, solves the repeated job, and stays manageable after the first use.
Let vehicle compatibility checks set the filter: Use VIN match, trim differences, and mounting points to decide what is essential.
Verify use-case match: Check measurements, model details, surfaces, hardware, wiring, or mounting work requirements before buying.
Price care routine: Include accessories, labor, storage, replacement timing, and any supplies needed to keep the display useful.
Final check: If the driving display is easy to fit, use, maintain, and support through a vehicle compatibility checks lens, it is more likely to be the right buy.
Reading Shortcuts
Jump to the sections that matter most when choosing driving displays for vehicle compatibility checks.
Decision Reminders
A quick checklist before you commit.
- Start with the job: Define what vehicle compatibility checks requires before comparing product claims.
- Confirm compatibility: Check fit, installation, warranty, and return details before purchase.
- Price ownership: Include supplies, accessories, labor, upkeep, and replacement timing.
Glossary Snippets
Quick translations for terms that confuse buyers most.
When to Use a Top 10 Review
Use this format when you want a faster way to narrow the driving displays field.
- You are early in the process: A Top 10 can separate everyday choices from specialized options before you compare fine details.
- You want a shortlist: Ranked picks help organize choices by fit, value, usability, and ownership tradeoffs.
Already down to 2-3 options? A Comparison is usually faster than broad buying advice.
When to Use a Comparison
Ideal once you have a shortlist and need practical tradeoffs.
- You narrowed it to 2-3 options: Direct comparisons make differences in fit, cost, setup, durability, and support easier to see.
- You are deciding between types: A comparison helps clarify whether a simpler, cheaper, or more specialized option fits better.
Still exploring? Start with a Top 10 to identify the right category first.