
How to Choose Cordless Drills for Everyday Repairs
The best drill for everyday repairs is usually the one that is charged, easy to carry, and controllable enough for small screws and household materials. Maximum output matters less when the real jobs are tightening hardware, hanging shelves, assembling furniture, drilling pilot holes, and fixing the things that loosen over time.
This guide explains how to choose a cordless drill that fits routine home maintenance without paying for jobsite capacity you will rarely use. It covers compact tool classes, battery readiness, clutch and chuck details, useful starter bits, storage, and the point where a tougher repair calls for a different tool.
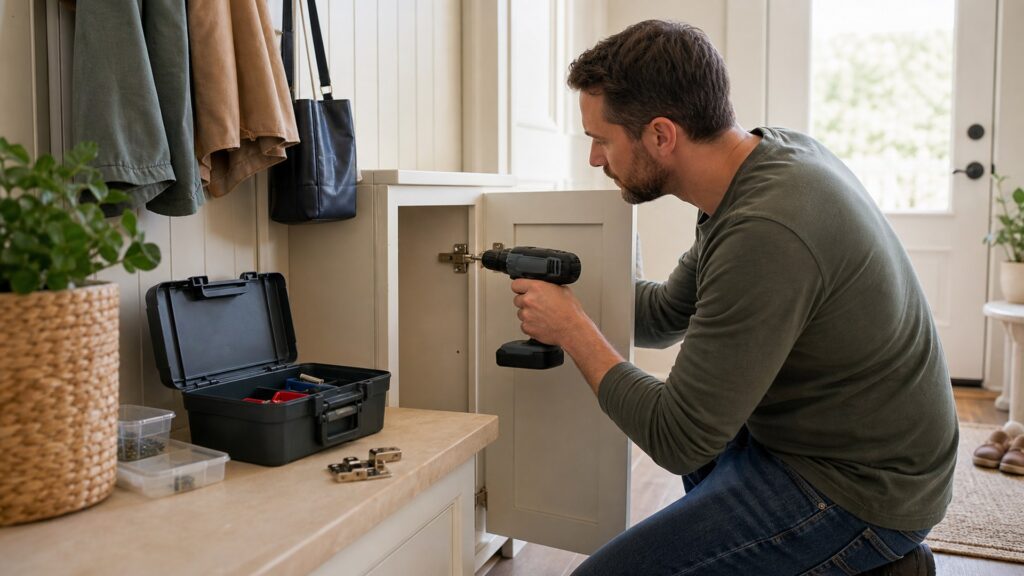
Buying framework
How to think about a cordless drill for everyday repairs
A household repair drill should reduce friction between noticing a problem and fixing it. Favor a manageable kit that stays organized, holds a charge, and gives careful control in cabinets, closets, walls, and assembled furniture.
List the jobs that actually recur: Think hinges, handles, curtain hardware, wall anchors, flat-pack furniture, loose railings, pilot holes, and minor outdoor fixes. These tasks rarely require a high-output flagship drill.
Prioritize grab-and-go readiness: A compact drill, charged battery, labeled bit case, and nearby charger make the tool useful. A powerful kit stored in several places often delays simple repairs.
Buy control for mixed materials: Home repairs move between soft wood, sheet goods, metal hardware, plastic, and drywall anchors. Smooth speed and a useful clutch help prevent stripped screws and damaged surfaces.
Keep the tool small enough for the house: Short head length and moderate weight help inside cabinets, under sinks, above shoulder height, and around furniture where a large battery becomes awkward.
Know the boundary of the tool: Masonry, large structural fasteners, repeated deck work, and major remodeling can justify a hammer drill, impact driver, or larger drill instead of stretching a light household model.
Who this is for
Choose a repair drill around your household and habits
The right kit depends on how often repairs happen, what the home is made from, and whether the drill will also support projects and outdoor maintenance.
Apartment and condo residents: A compact 12-volt drill with a small case is easy to store and capable of furniture assembly, fixtures, anchors, and minor maintenance.
First-time homeowners: Choose a versatile kit with two speeds, a clutch, a common chuck size, two batteries if affordable, and a starter selection of drill and driver bits.
Occasional users: Favor clear controls, low weight, and batteries with good shelf behavior. A simple charger and visible battery gauge reduce surprises after long storage.
Active DIY households: A compact brushless 18- or 20-volt drill offers more room for shelving, repairs, garden structures, and weekend projects without becoming a specialized heavy tool.
Older users or anyone managing hand strain: Look closely at grip circumference, trigger force, battery weight, and balance. A lighter tool can be more capable in practice when it stays comfortable and stable.
What to pay attention to
Which drill specs matter for routine household fixes
Everyday usefulness comes from handling and readiness first, then enough capability for the common materials and fasteners around the home.
Specs that affect feel
Weight, grip size, trigger smoothness, clutch markings, head length, work-light position, and battery balance affect confidence in awkward spaces.
Specs that affect capability
Chuck capacity, two-speed gearing, battery voltage and capacity, supported bits, and motor protection determine how far the drill can stretch into larger projects.
Compact dimensions: A short head helps the drill stay square to a fastener inside cabinets and furniture. Compare the tool with its normal battery attached.
Clutch and low-speed control: Predictable settings are valuable for small screws, switch plates, knobs, hinges, and ready-to-assemble furniture where overdriving causes damage.
Chuck size: A 3/8-inch chuck covers many household bits and keeps tools compact. A 1/2-inch chuck adds flexibility for larger bits if projects are likely to grow.
Battery gauge and charging: A visible charge indicator and straightforward charger make it easier to keep the drill ready. Fast charging matters less than remembering where the charger is and using it safely.
Integrated light: A well-placed light is genuinely useful under sinks, inside closets, and behind furniture. Check that the chuck does not cast a large shadow on the screw.
Often overvalued: Extreme torque, oversized batteries, and high top speed add little to most repairs. They may make the drill heavier and less forgiving.
Avoid these traps
Common mistakes when buying a household repair drill
Most disappointing repair kits are not too weak; they are too awkward, incomplete, or poorly stored to be convenient when something needs attention.
Buying a contractor kit for light repairs: A large drill and high-capacity battery can feel clumsy on hinges, handles, and furniture. Pay for capacity only when your project list needs it.
Choosing a kit by accessory count: Large bundles often include low-value bits and duplicates. A smaller set with the correct driver sizes, pilot bits, and anchor tools is more useful.
Ignoring the clutch: Running every fastener in drill mode increases the chance of stripped heads, cracked particleboard, and buried screws. Adjustable torque is a practical household feature.
Storing the battery empty: A neglected pack turns a two-minute repair into a charging wait. Follow the maker's storage guidance and check the battery periodically.
Using the wrong bit: A worn or mismatched driver bit slips and damages screws. Correct Phillips, Pozidriv, Torx, hex, and square-drive sizes matter more than extra motor power.
Treating every wall the same: Drywall, studs, tile, masonry, and metal framing require different bits and anchors. Identify the material before drilling.
Decision guidance
Which cordless drill fits everyday repair work
Choose by storage, comfort, and the hardest task you expect to repeat, then add only the accessories that solve real household jobs.
Choose a compact 12-volt kit if: You mainly assemble furniture, adjust hardware, hang light items, and drill small pilot holes. It is easy to store and usually pleasant to control.
Choose a compact 18- or 20-volt kit if: The drill will also handle shelving, outdoor repairs, thicker wood, and growing DIY projects. Use a compact battery for routine work.
Choose a hammer drill if: Small holes in brick, block, or concrete are a regular household need. Confirm the correct masonry bits and dust precautions.
Add an impact driver if: Long screws, exterior projects, or repeated fastening are common. Keep the drill for holes and controlled hardware work.
Use a hand tool instead if: The fastener is delicate, access is extremely tight, or the repair needs tactile feedback more than speed. A screwdriver remains the better choice for many final adjustments.
Ownership & compatibility
Build a repair kit that stays ready
Long-term value depends on whether the drill, battery, charger, bits, anchors, and storage remain together and understandable to everyone who may use them.
Battery platform: A common platform can support a light, inflator, vacuum, or yard tools, but do not accept a poor-fitting drill solely to reuse batteries.
Essential bit set: Keep common driver bits, small twist bits, brad-point bits, a countersink, nut drivers, and any anchor-specific bits your walls require.
Anchor and hardware storage: Label small containers for screws, wall anchors, picture hardware, and spare cabinet screws. Organized consumables make the drill more useful.
Charging location: Store the charger in a dry, ventilated place near the drill. Follow temperature and long-term storage guidance from the manufacturer.
Replacement availability: Check battery cost, warranty coverage, and the likelihood that compatible packs will remain easy to find.
Safety basics: Use eye protection, confirm hidden utilities before drilling walls, secure loose work, and stop if the material or anchor type is uncertain.
FAQ
Cordless drill FAQ for everyday repairs
Quick answers about voltage, batteries, chucks, bits, and common home maintenance tasks.
Is a 12-volt drill powerful enough for home repairs?
Do I need two batteries?
Should a household drill have a hammer mode?
What is the clutch used for?
Can I use a cordless drill for wall anchors?
Is a brushless motor necessary?
Bottom line
The simplest way to choose an everyday repair drill
Buy a compact, controllable drill that fits your storage and handles the hardest repair you expect to repeat. Keep it charged and pair it with a small, correct bit set.
For light household upkeep: A compact 12-volt kit is often the easiest and most economical choice.
For repairs plus DIY projects: A compact brushless 18- or 20-volt drill provides more range while remaining manageable with a small battery.
For masonry or heavy fastening: Choose the appropriate hammer drill or add an impact driver instead of forcing a light drill beyond its intended work.
Final check: Make sure the drill feels stable, the clutch is easy to understand, the charger has a permanent home, and the included bits match your actual screws and walls.
Reading Shortcuts
Jump to the choices that make a repair drill convenient and dependable.
Decision Reminders
A quick household checklist before checkout.
- Favor control: Small screws and mixed materials need a gentle trigger and useful clutch.
- Keep it ready: A permanent charging and storage spot prevents avoidable delays.
- Match the wall: Bits and anchors must suit drywall, wood, metal, tile, or masonry.
Glossary Snippets
Plain-language terms for first-time drill buyers.
When to Use a Top 10 Review
Use a ranked review when you want a manageable shortlist of household-friendly cordless drills.
- You are buying your first drill: A Top 10 can organize compact kits, values, and upgrade options.
- You know your voltage class: Use rankings after deciding whether light 12-volt handling or broader full-voltage capability fits.
Already comparing a few kits? A Comparison can clarify batteries, dimensions, and included accessories.
When to Use a Comparison
Use direct comparisons when the final choice depends on small differences in handling and kit value.
- Two kits cost about the same: Compare battery count, charger, clutch, chuck, warranty, and complete weight.
- You are choosing a platform: Look beyond the drill at replacement batteries and other household tools you may add.
Need a shortlist first? Start with the Top 10 cordless drills for practical categories and price points.