Why Single Axle Utility Trailers Fitment Matters

Single-axle utility-trailer fitment is the compatibility of the trailer with its towing vehicle, connection equipment, load, and fitted accessories. A coupler that reaches the hitch or a mower that sits on the deck proves only a small part of that compatibility. Ratings, operating height, clearances, electrical functions, and the loading method still matter.

A good match works as a complete loaded combination. The trailer must connect correctly, carry the intended load within its limits, and allow the equipment to be loaded and secured. Later additions such as a toolbox or spare-wheel carrier need the same scrutiny because they add mass and can obstruct movement or alter the load arrangement.

By: Review Streets Research Lab
Updated: October 7, 2026
Explainer · 8-12 min read
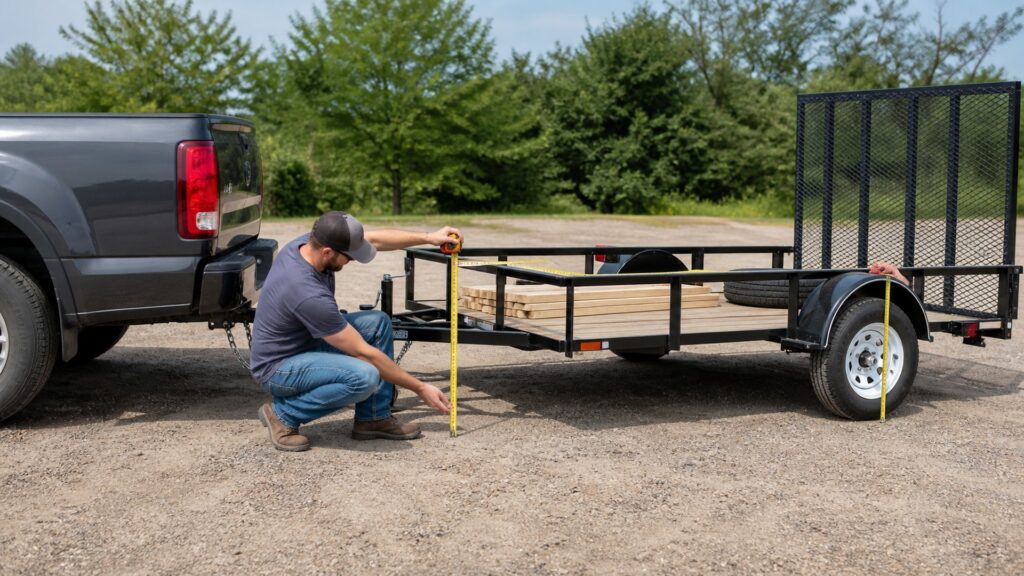
single axle utility trailers explainer hero image for Review Streets
What You'll Learn

Check Every Interface in the Loaded Combination

Go beyond a visual fit at the hitch or on the deck.

  • Why hitch size and rating are separate checks
  • How the specified towing attitude and clearances matter
  • Why load mass must include fitted accessories
  • What a suitable ramp must accommodate
  • How electrical and accessory compatibility complete the setup

Tip: Identify the exact tow vehicle, trailer, hitch components, and equipment before choosing parts.

Definitions

Six Fitment Concepts for a Utility Trailer

Each connects two parts of the working combination.

Coupling match

A coupling match means the towing connection components agree in type, size, rating, and permitted application.

  • Example: a ball matched to the marked coupler size
  • Check: both component instructions and condition
  • Limit: physical engagement alone does not prove compatibility

Towing attitude

Towing attitude is the trailer’s operating position relative to the ground when connected.

  • Example: checking the specified loaded trailer position
  • Check: manufacturer guidance and appropriate hitch arrangement
  • Limit: appearance does not establish correct tongue load

Operating clearance

Operating clearance is the space needed as the connected vehicle and trailer move.

  • Example: clearance between a front toolbox and the tow vehicle during a turn
  • Check: the full intended movement and component instructions
  • Limit: straight-ahead clearance can miss a turning conflict

Equipped mass

Equipped mass includes the trailer and its installed accessories before the planned cargo is added.

  • Example: a trailer carrying a permanent toolbox and spare carrier
  • Check: the actual configuration and applicable ratings
  • Limit: aftermarket accessories do not add carrying capacity

Ramp compatibility

Ramp compatibility means a ramp supports the intended load and loading geometry under its instructions.

  • Example: a ramp suitable for a specific mower’s mass and wheel spacing
  • Check: rating, width, attachment, and clearance
  • Limit: a gate that opens is not automatically a loading ramp

Electrical compatibility

Electrical compatibility means the vehicle and trailer provide the required supported electrical functions.

  • Example: a connector supplying the installed lights and brake system
  • Check: connector functions, controller requirements, and wiring instructions
  • Limit: a plug adapter does not create a missing brake-control function

Tip: Verify the configuration that will travel, including accessories and the actual cargo.

Connection

Match the Hitch Components by Specification

Read the trailer identification and coupling markings, then compare them with the tow vehicle and hitch documentation. Type, size, and rating all matter. A ball that looks close to the correct size or a latch that can be forced shut is not acceptable evidence. Use the prescribed connection, locking, and safety-connection procedures for the equipment.

  • Identify the exact coupler and hitch components.
  • Check the required ratings and marked size.
  • Reject worn, damaged, or mismatched parts.

Carry-On’s utility-trailer manual treats towing-vehicle selection and coupling compatibility as linked requirements. Follow its requirements where applicable rather than relying on a general claim that a vehicle can pull small trailers.

Reference: Carry-On towing and coupling instructions.

Geometry

Check the Loaded Position and Moving Clearances

Use the specified hitch arrangement to achieve the trailer’s required operating position. Assess clearances around the tongue, jack, front-mounted accessories, wiring, and safety connections. The combination changes shape as it turns and crosses surface transitions, so a parked straight-line view is incomplete. Resolve clearance problems using supported equipment, not improvised modifications.

  • Follow guidance for the loaded towing position.
  • Check turning and other permitted movement.
  • Keep required connections free from interference.

For example, a toolbox can clear a bumper when straight yet occupy space the vehicle needs during a turn. Its fitment must account for that movement before the combination is used.

Load

Include Every Addition in the Capacity Assessment

Add the trailer’s equipped mass and all cargo, then check the relevant trailer and towing-combination limits. Accessory placement can also change tongue load and axle loading. A front box, spare tire, or rack has an effect before it is filled. Check the specified distribution rather than treating empty deck area as permission to add weight.

  • Include permanent hardware and its contents.
  • Verify total mass and load distribution.
  • Reassess after equipment is moved or added.

A toolbox full of hand tools can consume capacity while leaving the main deck visually empty. The box’s location may matter as much as the floor area it occupies.

Loading

Match the Deck and Ramp to the Machine

For wheeled equipment, assess the route onto the deck as well as the final parking position. Ramp width, load rating, attachment, surface, and the machine’s clearance requirements must work together. A mower may fit between the rails while its deck or other low component interferes at the ramp transition. Use the machine’s transport instructions as well as the trailer’s.

  • Check actual machine dimensions and mass.
  • Confirm the ramp is intended for that loading task.
  • Allow access to the required restraint points.

Do not solve an unsuitable loading angle by improvising supports or changing a ramp beyond its instructions. Choose equipment or a loading arrangement approved for the task.

Completion

Verify Electrical Functions and Accessory Installation

Confirm that the vehicle supplies the functions the trailer’s installed systems require. A connector that plugs in does not prove correct lighting, brake control, or breakaway-system readiness. Accessories also need suitable attachment and their own instructions. Check that the finished installation leaves lights, identification, moving parts, and restraint provisions usable.

  • Test the actual installed functions.
  • Use supported accessory mounting methods.
  • Keep installation and service records with the trailer.

Carry-On lists separate ramps, boxes, racks, and electrical accessories. Their availability does not make every item suitable for every trailer; compatibility belongs to the particular installation.

Reference: Carry-On accessory range.

Quick Reality Check

A Visible Fit and a Complete Match

The first is useful evidence, but it does not replace the second.

Visible fit can show

The coupler reaches the hitch in a parked position.

The load occupies the available deck area.

Complete fitment also needs

Compatible ratings, loaded geometry, and moving clearances.

Suitable loading, restraint, electrical functions, and accessory attachment.

Common Myths

Common Utility-Trailer Fitment Assumptions

Avoid treating one successful connection as a complete approval.

If the coupler closes, the hitch is correct

Marked size, rating, condition, and the prescribed coupling check still matter.

A plug adapter provides every trailer function

It cannot create an absent controller, circuit, or other required equipment.

Accessories only matter when filled

Their own mass and placement affect the completed trailer.

A machine that fits on the deck can always be loaded

Ramp capacity, clearance, attachment, and loading geometry also need checking.

Tip: Reassess fitment after an accessory, towing vehicle, or regular load changes.

FAQ

Questions About Single-Axle Trailer Fitment

Answers for connecting the trailer to its actual job.

What information should I gather first?

Exact vehicle and trailer details, hitch and coupler markings, installed equipment, and the intended load.

Can a higher-rated hitch increase the vehicle’s towing limit?

No. The vehicle keeps its own limits and equipment requirements.

Why check clearances while turning?

The relationship between the tow vehicle, tongue, accessories, and connections changes during movement.

Can I fit any toolbox that fits the tongue space?

Only after confirming suitable mounting, clearance, mass distribution, and compatibility with the trailer instructions.

What should be checked after fitting equipment?

The complete loaded arrangement, required electrical functions, moving clearances, restraint access, and installation records.

Bottom Line

Trailer fitment succeeds when the towing connection, loaded geometry, equipment, and operating functions all work within their requirements.

Check the exact combination and reassess it whenever the vehicle, load, or accessories change.

Next Steps

Go Deeper or Compare Your Options

Use these Review Streets paths to compare related categories and practical next decisions.