How Detailing Kits Work

A detailing kit works as an ordered set of chemistry and contact media, not as a bag of interchangeable products. Inspection identifies the material, soil, defect, and finish goal. Washing removes loose contamination; chemical or mechanical decontamination addresses bonded material; correction abrades selected defects; residue removal prepares the surface; protection is then applied and cured as specified.

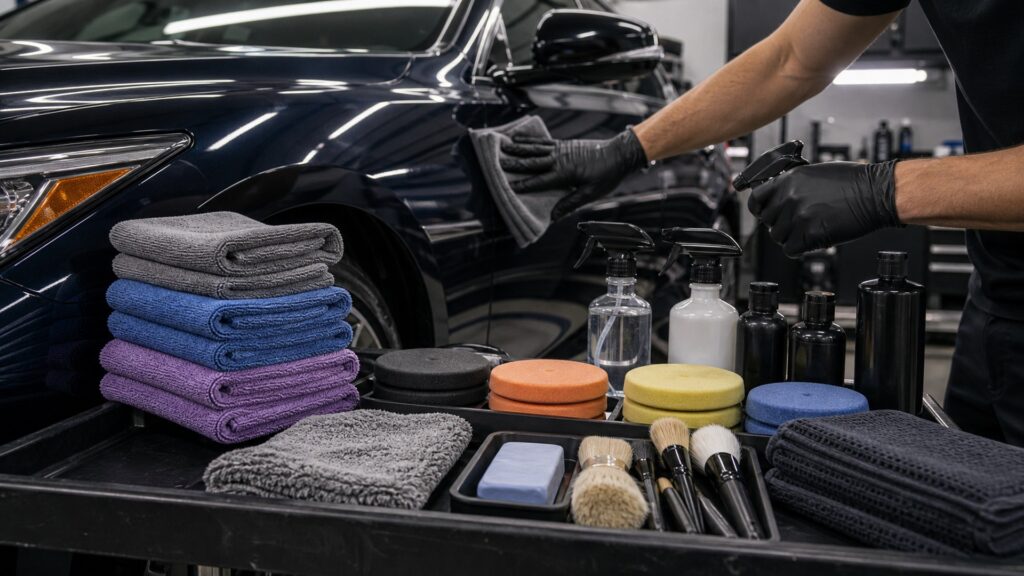
Each stage changes what the next one encounters. Clay on gritty paint can mar it, polishing over bonded contamination can load a pad, and protection over oils can bond poorly. Clean towels, pads, brushes, and applicators must be assigned by product and contamination zone. The kit succeeds only when the operator tests, inspects, and stops unnecessary stages.

By: Review Streets Research Lab
Updated: September 1, 2026
Explainer · 8-12 min read
detailing kits work explainer hero image for Review Streets
What You'll Learn

Follow the Surface, Not the Package Order

A useful kit supplies compatible steps, but the vehicle determines which are needed, how aggressive they may be, and whether the result is ready to advance.

  • Inspect material and finish condition
  • Remove loose soil before touching paint
  • Decontaminate only where evidence remains
  • Correct with a measured test spot
  • Remove oils and spent abrasive completely
  • Apply and cure protection as specified

Tip: Write the product and towel assignment before opening bottles; accidental cross-use between wheels, paint, glass, interiors, compounds, and protection can undo an otherwise careful sequence.

Definitions

Key Concepts That Define Detailing Kit Workflow

These terms explain how kit stages transform a surface and hand off evidence to the next stage. Stage gates include surface inspection, material test spot, prewash soil removal, chemical decontamination, mechanical clay decontamination, abrasive correction, panel residue removal, protection cure, and microfiber segregation.

Inspection Baseline

A documented view of material identity, contamination, defects, damage, temperature, and desired finish before products alter appearance.

  • Lighting changes what is visible
  • Wet gloss can conceal defects
  • Existing failure sets stop limits

Chemical Decontamination

Use of a compatible reactive or solvent process to release selected bonded contaminants such as iron deposits, tar, mineral residue, or organic film.

  • Chemistry targets specific soil
  • Dwell must stay controlled
  • Complete rinsing is required

Mechanical Decontamination

Physical removal of bonded contamination with lubricated clay or a synthetic medium after abrasive loose soil is removed.

  • Media condition affects marring
  • Lubrication limits drag
  • Polishing may follow

Abrasive Correction

Controlled removal or refinement of a surface layer using compound or polish, pad behavior, motion, pressure, time, and inspection.

  • Clear coat is finite
  • Test spots set the combination
  • Heat and residue affect results

Panel Preparation

Removal of polishing oils, fillers, dust, and other residue to expose the actual finish and meet protection requirements.

  • Solvents need material compatibility
  • Towels can reintroduce residue
  • Inspection confirms readiness

Media Segregation

Assignment, cleaning, storage, and retirement of towels, pads, mitts, applicators, and brushes according to surface and contamination.

  • Wheel grit stays separate
  • Protection towels can cure hard
  • Labels prevent cross-use

Tip: Product compatibility is specific to the substrate, contamination, temperature, dilution, dwell, media, and removal method; never infer it from color or scent.

Inspect and Test

The Workflow Begins by Defining the Surface Problem

Identify paint condition, film edges, trim, glass, wheels, leather, fabric, displays, coatings, and prior repairs. Test chemistry and technique in a small area so the mildest effective process becomes the baseline.

  • Use clean controlled lighting
  • Check temperature and existing damage
  • Identify the substrate before chemistry
  • Record the test combination and result

A kit cannot diagnose a surface merely because its products are packaged together.

Wash and Decontaminate

Loose Soil Leaves before Bonded Contamination Is Touched

Pre-rinse and lubricated washing reduce abrasive particles. Targeted chemical decontamination then dissolves or reacts with suitable deposits; clay removes remaining bonded texture only with clean lubrication and frequent media inspection.

  • Work on cool compatible surfaces
  • Prevent products from drying
  • Rinse reactions completely
  • Stop clay use when contaminated

Decontamination is selective escalation, not an automatic full-vehicle ritual.

Correct by Test Spot

Abrasive, Pad, Motion, and Time Remove a Finite Amount of Surface

Correction refines scratches and oxidation by controlled abrasion. Start with a conservative pad-product combination, inspect after residue removal, monitor heat and pad loading, and escalate only when additional clear-coat removal is justified.

  • Measure condition where appropriate
  • Prime and clean pads correctly
  • Use overlapping controlled passes
  • Preserve edges and thin areas

The goal is an acceptable durable finish, not removal of every visible defect.

Prepare and Protect

Residue-Free Surface Conditions Determine Bonding and Cure

After correction or decontamination, remove spent product and oils with a compatible method. Apply wax, sealant, coating, dressing, or other protection thinly and evenly, then respect leveling, cure, temperature, humidity, and water-avoidance instructions.

  • Use dedicated applicators and towels
  • Inspect high spots or residue
  • Control environment during cure
  • Document the product and application date

Protection should preserve the verified finish, not hide an unfinished stage.

Separate and Verify

Clean Media and Stage Gates Keep Earlier Contamination from Returning

A towel used on wheels, compound, glass, or an uncured coating cannot casually move to paint or interiors. After each stage, inspect cleanliness, residue, defects, material feel, drainage, and tool condition before proceeding.

  • Color-code contamination zones
  • Launder compatible media separately
  • Retire hardened or embedded tools
  • Skip stages the evidence does not require

The workflow is controlled by verification gates rather than the number of bottles used.

Quick Reality Check

A Kit Is Complete Only for a Defined Job

The package must contain compatible products, enough clean media, and the necessary sequence for the actual vehicle; piece count and shared branding do not establish completeness.

Evidence of a Coherent Kit

Labels identify supported materials, dilution, dwell, temperature, application, removal, cure, and safety; products do not conflict; and brushes, pads, applicators, and towels are sufficient and separable.

The workflow can stop after washing, decontamination, correction, or protection when inspection shows the next stage is unnecessary, unsafe, or unsupported by available tools and conditions.

What the Package May Omit

Water, power, drainage, lighting, PPE, thickness judgment, machine compatibility, replacement pads, extra towels, dilution bottles, drying time, repair tools, and products for a vehicle's particular materials may remain separate needs.

A kit cannot make damaged clear coat correctable, guarantee colorfastness, prevent every scratch, establish product compatibility across brands, or replace manufacturer instructions, operator skill, surface testing, and final inspection.

Common Myths

Misconceptions About Detailing Kit Workflow

Kit myths reward piece count, fixed sequencing, foam, or immediate gloss instead of material evidence and contamination control.

Every product in a kit should be used each time

Vehicle condition determines the workflow. Unnecessary clay can mar paint, unnecessary abrasion removes finite material, and incompatible dressing can alter a surface. Inspect, test, and skip any stage that lacks a defined problem.

Clay replaces washing because it grabs contamination

Clay is mechanical decontamination for bonded material after loose abrasive soil is safely washed away. Using it on dirty or poorly lubricated paint can trap grit, increase drag, and create marring that requires correction.

A more aggressive compound always saves time

Excess cut can add haze, heat, edge risk, pad loading, and unnecessary clear-coat removal, creating extra refining work. A test spot identifies the least aggressive combination that produces an acceptable verified finish.

All microfiber towels are interchangeable

Weave, nap, edge, absorbency, residue, and contamination history change towel behavior. Assign towels to washing, drying, glass, interiors, compound, polish, protection, and wheels, then launder separately or retire them appropriately.

Tip: Use only the stages the inspected surface needs, with dedicated media and verification before every handoff.

FAQ

Frequently Asked Questions About Detailing Kit Workflow

These answers cover kit completeness, stage order, test spots, clay, machine polishers, interior products, media care, and safe use when existing protection is unknown.

What should a beginner detailing kit include?

Start with inspection light, compatible wash method, drying media, labeled cleaners for known materials, applicators, ample segregated towels, PPE, and dilution tools. Add clay, abrasives, machines, or coatings only when a tested need exists.

Must decontamination happen before polishing?

Remove loose soil first, then address bonded contamination that would load the pad or distort inspection. Chemical and mechanical methods are selected by contaminant and substrate; polishing without decontamination can drag particles and reduce correction consistency.

How is a polishing test spot performed?

Choose a representative safe area, document its defects, begin with a conservative pad and abrasive, make controlled passes, remove residue, inspect under suitable light, and adjust one variable at a time before expanding the process.

Can exterior products be used inside?

Only when the product specifically supports the identified interior material and its application conditions. Cabin surfaces add skin contact, inhalation, glare, slipperiness, electronics, dye, adhesive, and moisture concerns that exterior compatibility does not answer.

What if the vehicle already has unknown protection?

Wash conservatively, inspect behavior after contamination removal, avoid aggressive stripping by default, and test any chemical or abrasive in a small area. Unknown beading does not establish layer type, condition, cure, or compatibility.

Bottom Line

Detailing kits work by coordinating inspection, soil removal, selective decontamination, measured correction, residue removal, protection, and clean-media control as one evidence-driven sequence.

The vehicle—not the package—decides which stages are necessary. Test first, use the least aggressive effective method, verify every handoff, and keep contaminated or product-loaded media from reentering the workflow.

Next Steps

Build the Kit around Verified Stage Gates

Related explainers compare kits with durable equipment capacity, show when each category should lead, and trace how wash equipment performs the initial soil-removal stage.