
Clear Coat
The transparent upper paint layer that supplies gloss and environmental protection on many modern finishes.
- Contains finite refinishing allowance
- Thickness varies by panel and repair history
- Failure cannot be polished back into existence
Paint correction matters because many visible swirls, sanding marks, oxidation patterns, and shallow scratches are irregularities in the upper paint surface. Controlled abrasion can level or refine that surface so light reflects more uniformly, improving clarity without adding a concealing film.
Every correction also removes a finite amount of material. The operator must identify the paint system, inspect prior repairs, measure where practical, select the least aggressive effective combination, control heat, and confirm the result under revealing light. Deep damage, thin edges, failing clear coat, and unknown repaint history can turn a cosmetic improvement into an irreversible loss of protection.
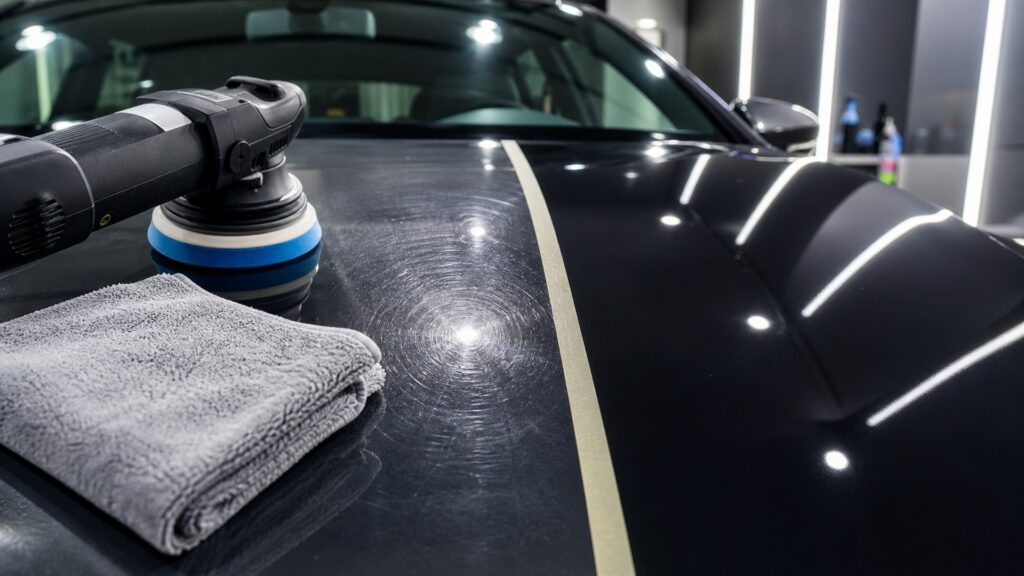
Correction succeeds when diagnosis, abrasive action, residue removal, and inspection form a controlled loop rather than a pursuit of maximum gloss.
Tip: Mark one representative test area and do not expand the process until clean inspection light confirms both defect improvement and an acceptable finish.
These terms separate genuine surface refinement from temporary filling or uncontrolled material removal.
The transparent upper paint layer that supplies gloss and environmental protection on many modern finishes.
A small representative area used to find the least aggressive process that meets the target.
The rate and character of material removal produced by liquid, pad, tool, pressure, and motion.
A measurement that helps compare coating build across locations and identify anomalies.
Directional polishing marks that become visible under strong point-source light, especially on dark paint.
Removal through the clear or color layer, exposing a lower layer or substrate.
Tip: Record the starting condition, tool combination, cycle count, and final observation; repeatability is more valuable than an aggressive one-pass result.
Point-source and diffuse lighting reveal different features. Swirls scatter light in arcs, oxidation lowers clarity, and scratches change appearance with viewing angle. Cleaning first prevents residue from being mistaken for damage or improvement.
A defect must be located within the paint system before an abrasive remedy can be justified.
A test spot combines the candidate liquid, pad, machine motion, speed, pressure, and working time on representative paint. The result reveals whether the combination removes the target while finishing acceptably.
The correct process is discovered on this paint, not inherited from a product label or online recipe.
Abrasives cut high points around shallow defects and then refine the texture they create. A compound usually prioritizes leveling; a finishing polish reduces the haze or micro-marring left by stronger action.
Correction makes a defect shallower by changing surrounding material; it does not pull missing paint back upward.
Pad friction and repeated cycles raise panel temperature, while edges and raised lines often carry less coating and concentrate contact. Refinished panels may respond differently from adjacent factory paint.
The places that polish fastest can also be the places with the least material available.
Polishing oils and dust can temporarily obscure marks. A compatible inspection wipe, clean towel, controlled light, and view from several angles reveal residual defects, haze, and holograms before protection is applied.
A finish is corrected only to the extent that it remains improved after concealment and residue are removed.
Correction can restore clarity, but the paint sacrificed to reach a defect cannot be replaced by polishing.
Controlled refinement can remove or reduce wash marring, oxidation, sanding texture, haze, and shallow defects while improving reflected-light clarity.
A documented test spot can deliver a consistent finish with less unnecessary material removal than an aggressive blanket process.
Deep scratches, chips, cracking, delamination, and missing clear or color require acceptance, touch-up, or refinishing rather than repeated polishing.
Thickness readings, lighting, and experience reduce uncertainty but do not reveal an exact universal safe-removal allowance for every panel.
Correction myths usually confuse visual improvement with paint addition, or treat one aggressive combination as safe everywhere.
Compounding and polishing remove or reshape a small amount of existing surface; they do not spray new clear. Any protection applied afterward is a separate, much thinner system with a different job.
Most common gauges report total film over a compatible substrate, not an isolated clear-coat measurement. Comparison across panels can expose anomalies, but interpretation still requires paint history, location, and instrument limits.
Heavy cut can shorten the initial leveling step while creating haze, heat, edge risk, and extra refinement work. A test spot often shows that a milder combination reaches the target with less total cost.
A deep scratch may extend too far into the coating stack for safe leveling. Rounding its edges can reduce visibility, but preserving UV-protective clear and avoiding strike-through may require leaving part of it.
Tip: Define success as the best durable appearance compatible with remaining coating health, not the disappearance of every mark.
These answers cover new vehicles, scratch depth, measurement, protection timing, and the difference between enhancement and full correction.
Yes. Transport, washing, dealer preparation, spot repair, and storage can leave defects on new paint. Age does not set the process; clean inspection, paint history, and the owner's finish target do.
Clean it and inspect from several angles. A scratch that catches a fingernail, changes color, or exposes primer deserves caution, but only paint-system assessment can determine whether leveling is sensible.
No. Paint hardness, thickness, curvature, temperature, prior repair, and defect load can vary across one vehicle. Use the test combination as a starting point and verify each changed surface before continuing.
Apply protection after polishing residue is removed and the surface meets that product's preparation requirements. Coatings may demand stricter oil removal and cure conditions than waxes, sealants, or short-duration spray products.
It is a deliberately limited process that balances modest defect reduction with acceptable finishing in one main polishing stage. The label describes a time and outcome target, not a guaranteed percentage of removal.
Paint correction matters because controlled abrasive refinement can restore optical clarity while preserving as much functional paint as possible.
Diagnose the defect, prove the least aggressive process on a test spot, manage temperature and vulnerable geometry, then inspect without fillers; safe residual damage is better than cosmetic perfection bought with coating failure.
Continue with the detailing sequence, coating mechanism, and broader protection decision once inspection shows what correction actually achieved.
Place correction between decontamination and protection in the complete surface-care sequence.
See how a cured coating preserves the prepared surface without concealing unresolved defects.
Match the corrected finish to protection against the exposure that actually threatens it.
Choose a retailer
Prices checked regularly. We may earn a commission at no cost to you.